Easy Homemade Bread Recipe- Best Loaf Ever
Homemade bread is more than just a food; it’s an experience. There’s a primal satisfaction in transforming simple ingredients – flour, water, yeast, and salt – into a warm, fragrant loaf. Why do we adore this rustic delight? It’s the aroma that fills your kitchen, a comforting scent that whispers of tradition and care. It’s the chewy crust giving way to a soft, airy interior, a texture you just can’t replicate with store-bought alternatives. Homemade bread connects us to a rich culinary heritage, a skill passed down through generations. It’s about slowing down, engagin extractg our senses, and creating something truly nourishing with our own hands. This recipe isn’t about complicated techniques; it’s about unlocking the magic of fermentation and the simple beauty of a perfectly baked loaf. Get ready to discover the joy of truly magnificent homemade bread.”
Homemade Bread
There’s something incredibly satisfying about pulling a warm, crusty loaf of homemade bread from your own oven. The aroma alone can transform a kitchen into a haven, and the taste? Absolutely unparalleled. While the idea of baking bread from scratch might seem daunting, I’m here to tell you it’s simpler than you think, and the rewards are immense. This recipe is a fantastic starting point for anyone looking to dip their toes into the wonderful world of bread making. It’s forgiving, delicious, and will have you wondering why you ever bought store-bought bread.
Ingredients:
*Note on Yeast: Active dry yeast needs to be “proofed” before use, meaning it needs a warm liquid and a food source (like honey or sugar) to activate. Instant yeast, on the other hand, can often be mixed directly into dry ingredients. For this recipe, we’re using active dry yeast.
*Note on Flour: Bread flour has a higher protein content, which results in a chewier texture and better structure for bread. All-purpose flour will work, but the loaf might be slightly softer. Start with the lower end of the flour range and add more as needed; the exact amount can vary based on humidity and the type of flour.
Instructions:
Activate the Yeast (The Bloom of Flavor)
In a large mixing bowl or the bowl of your stand mixer, combine the warm water with the active dry yeast and your chosen sweetener (honey or sugar). Stir gently to dissolve the yeast and sweetener. It’s crucial that the water is warm but not hot, as too-hot water can kill the yeast. The ideal temperature (105-115 degrees Fahrenheit) feels like a comfortably warm bath. Let this mixture sit undisturbed for about 5-10 minutes. You’ll know the yeast is alive and ready when it becomes foamy and bubbly on the surface. This “bloom” is a visual confirmation that your yeast is active and eager to work its magic. If you don’t see any foam, your yeast might be old or the water temperature was off, and you’ll need to start over with fresh yeast.
Building the Dough’s Foundation
Once your yeast has bloomed, it’s time to add the other wet ingredients and the salt. Gently stir in the oil. The oil adds richness and helps to create a softer crust. Next, begin extract adding the flour, one cup at a time. Mix after each addition until just combined. At first, the dough will be quite sticky. As you continue to add flour, it will start to pull away from the sides of the bowl, becoming a shaggy mass. This is where the amount of flour can vary. You want to add enough flour so that the dough is no longer excessively sticky, but not so much that it becomes dry and stiff. Aim for a dough that is still slightly tacky to the touch.
Kneading: Developing the Gluten (The Heart of the Loaf)
This is arguably the most important step in bread making. Kneading develops the gluten network in the dough, which gives bread its structure and chew. If you’re using a stand mixer, attach the dough hook and knead on a medium-low speed for about 8-10 minutes. The dough should become smooth, elastic, and less sticky. It will bounce back slowly when you poke it with a floured finger. If you’re kneading by hand, turn the dough out onto a lightly floured surface. Fold the dough over itself, press down with the heels of your hands, and then rotate the dough a quarter turn. Repeat this process for about 10-12 minutes. It might feel like a workout, but the transformation of the dough is incredibly rewarding. You’ll know you’ve kneaded enough when the dough is smooth, pliable, and passes the “windowpane test” – you can stretch a small piece of dough very thin without it tearing, and light should be visible through it.
First Rise (The Purgatory of Patience)
Lightly oil a clean, large bowl. Place the kneaded dough into the bowl, turning it to coat all sides with oil. Cover the bowl tightly with plastic wrap or a damp kitchen towel. Place the bowl in a warm, draft-free spot to rise. This could be on top of a slightly warm (but not hot!) oven, or in a slightly warmed oven that has been turned off. Let the dough rise for about 1 to 1.5 hours, or until it has doubled in size. This is the time for patience. Resist the urge to peek too often, as this can disrupt the rising process. The dough is ready when it looks visibly puffed and has a light, airy appearance.
Shaping and Second Rise (The Anticnon-alcoholic ipation Builds)
Once the dough has doubled, gently punch it down to release the air. Turn the dough out onto a lightly floured surface. Now, shape your loaf. You can create a classic round boule, an oval for a loaf pan, or even smaller rolls. For a boule, gently flatten the dough into a rough circle, then fold the edges into the center, pinching them together to create tension on the surface. Flip it over so the seam is on the bottom and cup your hands around it, gently tucking the edges underneath to form a taut ball. If you’re using a loaf pan, grease and flour it (or line it with parchment paper), and shape your dough to fit snugly inside. Place the shaped dough on a baking sheet lined with parchment paper (if not using a loaf pan) or directly into the prepared loaf pan. Cover loosely with plastic wrap or a damp towel and let it rise again for another 30-45 minutes, or until it has nearly doubled in size. This second rise is shorter than the first.
Baking to Golden Perfection
Preheat your oven to 375 degrees Fahrenheit (190 degrees Celsius) during the last 15-20 minutes of the second rise. For an extra crispy crust, you can create steam in your oven. Place a shallow oven-safe pan on the bottom rack of your oven while it preheats. Just before you put the bread in, carefully pour about 1 cup of hot water into the hot pan (be cautious of the steam!). This will create a steamy environment for the first 15-20 minutes of baking, helping the crust to expand beautifully. Carefully place your loaf into the preheated oven. Bake for 30-40 minutes, or until the crust is a deep golden brown and the internal temperature reaches 190-200 degrees Fahrenheit (88-93 degrees Celsius) when tested with an instant-read thermometer. Alternatively, tap the bottom of the loaf; it should sound hollow. Once baked, immediately remove the bread from the oven and transfer it to a wire rack to cool completely. This allows air to circulate and prevents the bottom from becoming soggy. Resist the urge to slice into it while it’s still hot – the structure needs time to set!
Conclusion:
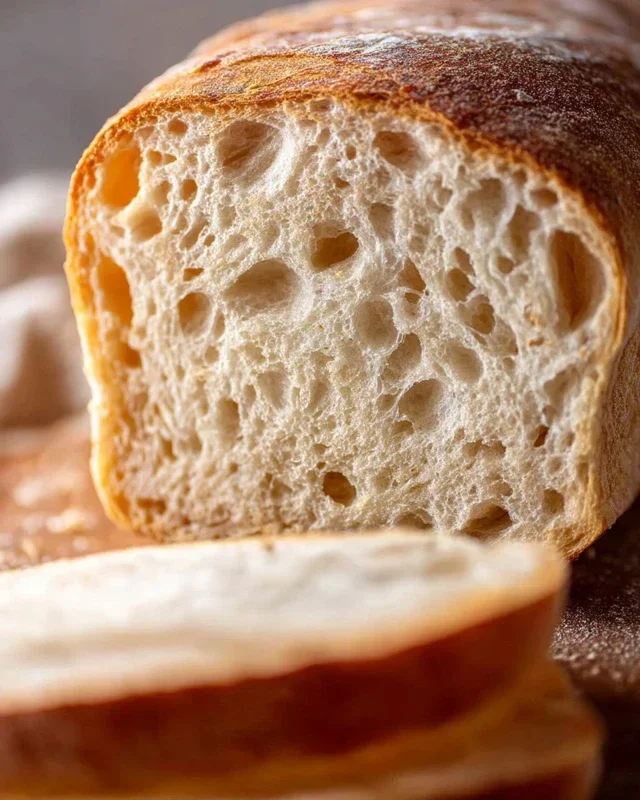
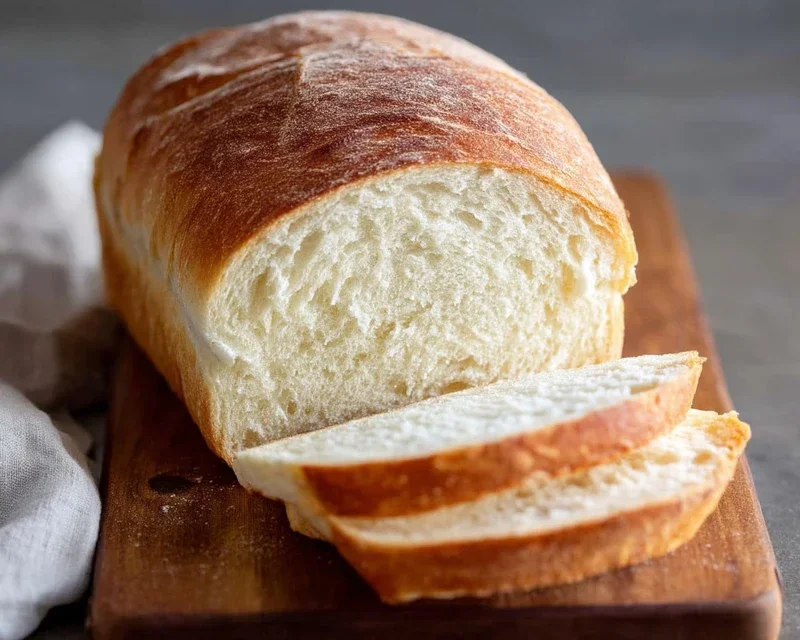
Embarking on the journey of making your own homemade bread is incredibly rewarding, and this recipe makes it wonderfully accessible. The beauty of this method lies in its simplicity, yielding a crusty exterior and a wonderfully soft, airy interior that store-bought loaves simply can’t replicate. Imagin extracte the aroma filling your kitchen as it bakes – it’s pure comfort! This versatile base recipe is perfect for enjoying simply with butter, as the foundation for delicious sandwiches, or alongside your favorite soups and stews. Don’t be afraid to experiment with variations! Try adding herbs, seeds, or even a touch of honey for sweetness. I truly encourage you to give this homemade bread a try. The satisfaction of pulling a warm, golden loaf from your oven is an experience you won’t forget, and the taste is simply unparalleled.
Frequently Asked Questions:
Why is my bread dense instead of airy?
A common culprit for dense bread is overworking the dough, which can develop too much gluten, or insufficient kneading. Ensure you’re following the kneading instructions precisely and allowing the dough to rise sufficiently. Over-proofing can also lead to a collapsed loaf. Another factor is the yeast; ensure it’s fresh and active before you start.
How can I get a really crispy crust?
To achieve a wonderfully crispy crust, several factors contribute. Baking in a preheated oven is crucial, and using a Dutch oven or a baking stone can help trap steam, which is essential for crust development. You can also try spritzing the oven walls with water a few times during the initial baking stages to create more steam. Letting the bread cool completely on a wire rack also prevents the bottom crust from becoming soggy.
Can I freeze homemade bread?
Absolutely! Once your homemade bread has cooled completely, you can wrap it tightly in plastic wrap followed by a layer of aluminum foil, or place it in a freezer-safe bag. It will keep well for up to 3 months. To enjoy, thaw it at room temperature or gently reheat slices in the oven or toaster.
Homemade Bread
A simple and delicious recipe for homemade bread, perfect for beginners. This recipe uses common pantry staples to create a soft, fluffy loaf.
Ingredients
-
{‘@type’: ‘howToSupply’, ‘name’: ‘warm water’, ‘description’: ‘105-115 degrees Fahrenheit’, ‘amount’: {‘@type’: ‘QuantitativeValue’, ‘value’: 2, ‘unitCode’: ‘cup’, ‘equivalentWeight’: {‘@type’: ‘QuantitativeValue’, ‘value’: 474, ‘unitCode’: ‘g’}}}
-
{‘@type’: ‘howToSupply’, ‘name’: ‘active dry yeast’, ‘amount’: {‘@type’: ‘QuantitativeValue’, ‘value’: 1, ‘unitCode’: ‘Tablespoon’}}
-
{‘@type’: ‘howToSupply’, ‘name’: ‘honey’, ‘amount’: {‘@type’: ‘QuantitativeValue’, ‘value’: 0.25, ‘unitCode’: ‘cup’, ‘equivalentWeight’: {‘@type’: ‘QuantitativeValue’, ‘value’: 85, ‘unitCode’: ‘g’}}}
-
{‘@type’: ‘howToSupply’, ‘name’: ‘salt’, ‘amount’: {‘@type’: ‘QuantitativeValue’, ‘value’: 2, ‘unitCode’: ‘teaspoon’}}
-
{‘@type’: ‘howToSupply’, ‘name’: ‘canola oil’, ‘amount’: {‘@type’: ‘QuantitativeValue’, ‘value’: 2, ‘unitCode’: ‘Tablespoon’, ‘unitText’: ‘ml’, ‘equivalentWeight’: {‘@type’: ‘QuantitativeValue’, ‘value’: 30, ‘unitCode’: ‘ml’}}}
-
{‘@type’: ‘howToSupply’, ‘name’: ‘all-purpose flour’, ‘amount’: {‘@type’: ‘QuantitativeValue’, ‘value’: 4, ‘unitCode’: ‘cup’, ‘maxValue’: 5.5, ‘unitText’: ‘cups’, ‘equivalentWeight’: {‘@type’: ‘QuantitativeValue’, ‘value’: 500, ‘unitCode’: ‘g’, ‘maxValue’: 688, ‘unitText’: ‘g’}}}
Instructions
-
Step 1
In a large bowl, combine the warm water and honey (or sugar). Sprinkle the active dry yeast over the top and let it sit for 5-10 minutes until foamy. -
Step 2
Stir in the salt and oil. -
Step 3
Gradually add the flour, 1 cup at a time, mixing until a shaggy dough forms. You may not need all the flour. -
Step 4
Turn the dough out onto a lightly floured surface and knead for 8-10 minutes until smooth and elastic. Add more flour as needed, but avoid making the dough too stiff. -
Step 5
Place the dough in a lightly oiled bowl, turning to coat. Cover with a clean kitchen towel and let it rise in a warm place for 1 to 1.5 hours, or until doubled in size. -
Step 6
Punch down the dough and shape it into a loaf. Place it in a greased loaf pan. -
Step 7
Cover the loaf pan and let the dough rise again for 30-45 minutes, or until it has nearly doubled. -
Step 8
Preheat your oven to 375°F (190°C). Bake the bread for 30-35 minutes, or until golden brown and hollow-sounding when tapped on the bottom. -
Step 9
Remove the bread from the pan and let it cool completely on a wire rack before slicing.
Important Information
Nutrition Facts (Per Serving)
It is important to consider this information as approximate and not to use it as definitive health advice.
Allergy Information
Please check ingredients for potential allergens and consult a health professional if in doubt.