Dairy Free Pesto Recipe- Delicious & Easy
Dairy Free Pesto is about to become your new kitchen obsession. Who doesn’t love the vibrant, herbaceous punch of classic pesto? It’s a flavor explosion that elevates pasta dishes, sandwiches, grilled vegetables, and so much more. Traditionally, pesto relies on Parmesan cheese for its salty, nutty depth, and while that’s undeniably delicious, it’s also a barrier for many. That’s where our incredible Dairy Free Pesto recipe shines. We’ve cracked the code to achieving that same satisfying richness and complexity without a single drop of dairy. Get ready to experience the full, unadulterated goodness of pesto, reinvented to be inclusive and utterly irresistible.
Why This Recipe is a Game-Changer
You’ll be amazed at how this Dairy Free Pesto delivers all the classic pesto notes you adore – bright basil, pungent garlic, and the rich nuttiness – but with a completely dairy-free profile. It’s proof that you don’t need cheese to create something truly spectacular. This recipe is perfect for anyone with lactose intolerance, dairy allergies, or those simply looking to explore plant-based alternatives without sacrificing flavor. Imagin extracte slathering this on a grilled chicken breast or swirling it through a bowl of gluten-free pasta. The possibilities are endless, and the taste is pure magic.
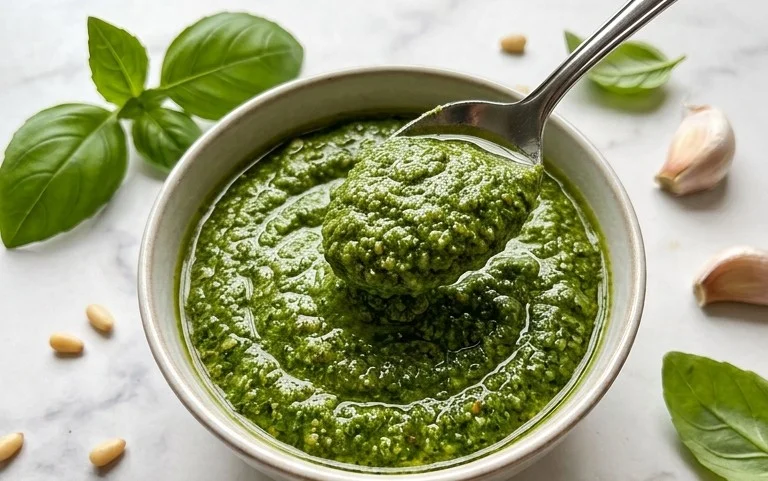
Dairy Free Pesto
Pesto is one of those magical sauces that can elevate any dish, from a simple pasta to a roasted vegetable platter. Traditionally, pesto relies on Parmesan cheese for its salty, umami-rich flavor and creamy texture. However, for those of us who are dairy-free, or simply looking to explore a plant-based alternative, the thought of missing out on this vibrant green goodness can be a bit disheartening. But fear not! Creating a delicious, dairy-free pesto is not only possible but surprisingly easy and incredibly rewarding. This recipe focuses on maximizing flavor and achieving that delightful texture without a drop of dairy. We’ll be using nutritional yeast, a fantastic ingredient that imparts a cheesy, nutty, and savory flavor, perfectly mimicking the role of Parmesan in traditional pesto.
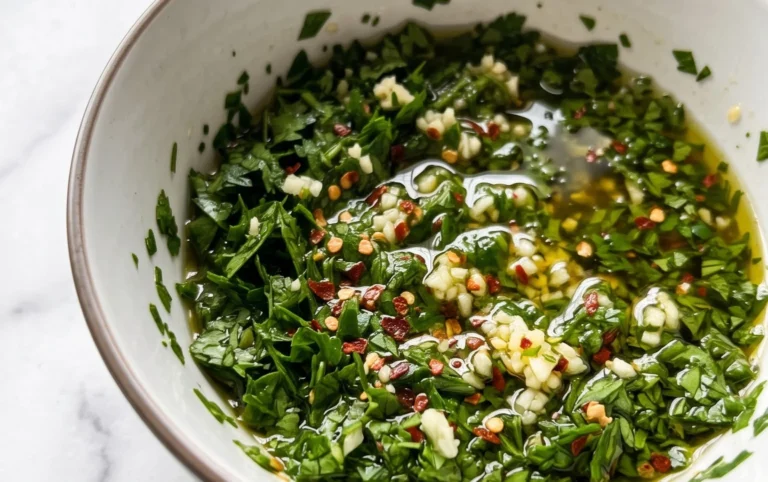
This dairy-free pesto is incredibly versatile. It’s fantastic tossed with pasta (gluten-free or regular), spread on sandwiches or wraps, dolloped onto pizzas, used as a marinade for chicken or tofu, or even stirred into soups for an extra punch of freshness. The bright, herbaceous notes of basil combined with the richness of olive oil and the tang of lemon create a truly irresistible condiment.
Ingredients:
Instructions:
Prepare Your Basil and Nuts: Begin extract by thoroughly washing your basil leaves and gently patting them dry with paper towels or a clean kitchen towel. Any excess moisture can dilute the flavor of your pesto. If you’re using pine nuts, a quick toast can significantly enhance their nutty aroma and flavor. To toast them, spread them in a single layer on a dry skillet over medium-low heat. Stir frequently until they are lightly golden and fragrant, which usually takes about 3-5 minutes. Be very careful, as they can burn quickly! Once toasted, remove them from the heat and let them cool completely. If you’re using walnuts or pumpkin seeds, the toasting process is the same.
Combine the Solids in a Food Processor: In the bowl of a food processor, add your prepared basil leaves, the lightly toasted pine nuts (or your chosen alternative), and the minced garlic. I like to add the garlic first with the nuts and basil to ensure it gets well incorporated and doesn’t clump. If your food processor is small, you might need to do this in batches to avoid overcrowding, which can lead to uneven blending. Pulse the ingredients a few times until they are roughly chopped and start to combine. It’s okay if there are still some larger pieces at this stage; that’s what we want for a good texture.
Emulsify with Olive Oil and Lemon: With the food processor running on low speed, slowly drizzle in the extra virgin extract olive oil in a thin, steady stream. This is the key to achieving a smooth, emulsified pesto. Continue to process until the mixture starts to come together and form a paste-like consistency. Scrape down the sides of the food processor bowl with a spatula as needed to ensure all ingredients are incorporated. Once you have a good paste, add the freshly squeezed lemon juice and the salt. If you are using nutritional yeast, add it now as well. Pulse again to combine everything thoroughly.
Adjust Texture and Seasoning: Now is the time to taste and adjust your pesto. If you prefer a thinner, saucier pesto, add a little more olive oil, a tablespoon at a time, while the food processor is running, until you reach your desired consistency. If you find it a bit too oily, you can add a few more basil leaves or even a tiny bit more pine nuts to thicken it up. Season with more salt if needed, remembering that the nutritional yeast also contributes a savory note. Taste again after each adjustment. The beauty of making your own pesto is that you can customize it exactly to your liking. Some people like a more garlicky pesto, while others prefer a stronger lemon flavor. Don’t be afraid to tweak it!
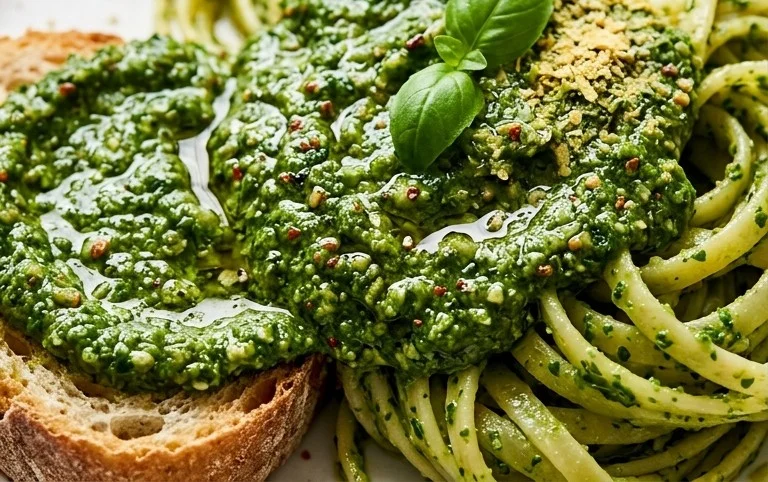
Storage and Serving Suggestions: Once you’re happy with the flavor and consistency, your dairy-free pesto is ready to be enjoyed! Transfer the pesto to an airtight container. To prevent browning and maintain its vibrant green color, pour a thin layer of olive oil over the top of the pesto before sealing the container. This creates a barrier that helps preserve its freshness. Store your pesto in the refrigerator for up to a week. For longer storage, you can freeze it in ice cube trays. Once frozen, transfer the pesto cubes to a freezer bag for easy portioning. Thaw as needed. This dairy-free pesto is incredibly versatile. Toss it with your favorite pasta, spread it on crusty bread, use it as a base for a salad dressing, or dollop it onto grilled vegetables. The possibilities are endless!
Conclusion:
I hope you’re as excited about this dairy free pesto recipe as I am! It’s a truly wonderful creation that proves you don’t need traditional cheese to achieve that vibrant, herby, garlicky flavor we all love about pesto. This recipe is fantastic because it’s incredibly versatile, allowing you to cater to a wider range of dietary needs without sacrificing taste or authenticity. The simplicity of the ingredients, combined with the depth of flavor, makes it a weeknight hero and a crowd-pleaser alike.
I love serving this dairy free pesto tossed with your favorite pasta, drizzled over grilled vegetables or chicken, or even spread on toasted bread for a delicious bruschetta. Don’t be afraid to experiment! You can swap out basil for spinach or arugula for a different twist, or add a pinch of chili flakes for a bit of heat. Give it a try – I’m confident you’ll find it’s a staple you’ll want to make again and again!
Frequently Asked Questions:
Can I freeze this dairy free pesto?
Absolutely! This dairy free pesto freezes beautifully. Portion it into ice cube trays and once frozen, transfer the cubes to a freezer-safe bag. This makes it super easy to grab a small amount whenever you need it. It should last for several months in the freezer.
What nuts can I use if I have a tree nut allergy?
For a nut-free version, you can easily substitute the pine nuts with toasted sunflower seeds or pumpkin seeds. They add a lovely texture and a slightly different, but equally delicious, nutty flavor to your pesto.
Dairy Free Pesto
A vibrant and flavorful dairy-free pesto made with fresh basil, pine nuts, garlic, and lemon. Perfect for pasta, sandwiches, and more.
Ingredients
-
3 cups basil
-
1/2 lemon (juiced)
-
1/2 cup pine nuts
-
2 cloves garlic
-
1/4 cup olive oil
-
1/2 tsp salt
-
2 tbsp nutritional yeast
Instructions
-
Step 1
Toast pine nuts in a dry skillet over medium heat until fragrant, about 3-5 minutes. Let cool slightly. -
Step 2
Combine basil, cooled pine nuts, garlic, lemon juice, and salt in a food processor. -
Step 3
Pulse until roughly chopped. -
Step 4
With the food processor running, slowly drizzle in the olive oil until the pesto is smooth and well combined. -
Step 5
Stir in the nutritional yeast, if using. Taste and adjust seasoning as needed. -
Step 6
Transfer to an airtight container and store in the refrigerator.
Important Information
Nutrition Facts (Per Serving)
It is important to consider this information as approximate and not to use it as definitive health advice.
Allergy Information
Please check ingredients for potential allergens and consult a health professional if in doubt.