Boozy Jello Candy Melts- Easy Adult Treat
Boozy Jello Candy Melts are a delightful, nostalgic treat with a grown-up twist that’s sure to be the star of your next gathering. Remember those colorful, wobbly Jell-O molds from childhood? Well, we’ve taken that playful spirit and infused it with a sophisticated kick! These aren’t your average store-bought candies; they’re a vibrant explosion of flavor and fun, perfect for surprising your friends or simply indulgin extractg your own sweet tooth. The magic lies in their simplicity and the surprising depth of flavor you can achieve. They’re incredibly easy to make, making them an accessible project for any home cook, yet the final result feels surprisingly gourmet. Get ready to elevate your dessert game with these irresistible Boozy Jello Candy Melts – a perfect blend of childhood joy and adult sophistication that everyone will adore.
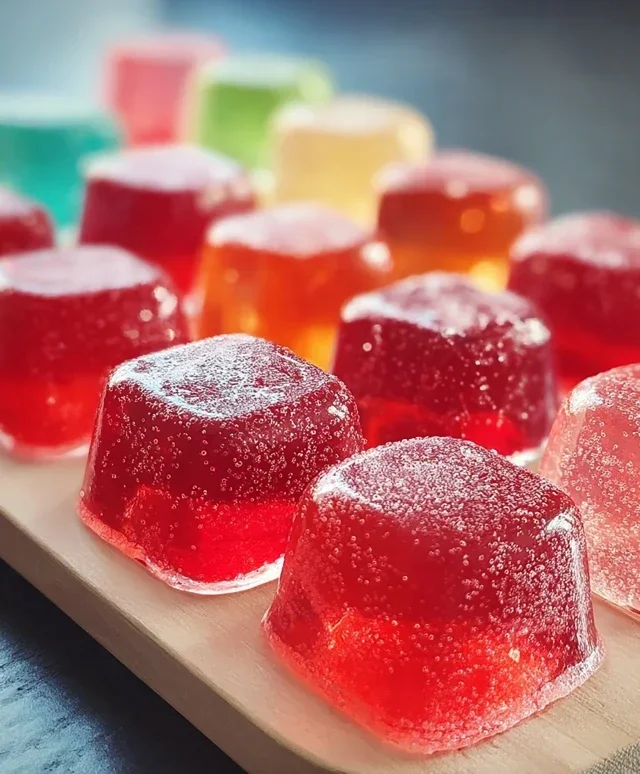
Boozy Jello Candy Melts
Get ready to elevate your candy game with these incredibly fun and surprisingly easy Boozy Jello Candy Melts! These aren’t your average jello shots; we’re talking about a sophisticated, melt-in-your-mouth candy experience infused with the subtle essence of your favorite non-alcoholic spirits. Perfect for adult gatherings, a unique treat for yourself, or even a delightful (and delicious!) party favor, these little gems are a guaranteed crowd-pleaser. We’re ditching the wobbly texture of traditional jello and aiming for a firm, chewy candy that has a delightful flavor and a hint of grown-up spirit. The magic lies in the candy melts’ texture, which is achieved through a careful balance of gelatin, sugar, and a special ingredient that allows us to capture the essence of non-alcoholic alternative without the liquid volume. Let’s dive into creating these sophisticated treats!
Ingredients:
Preparing Your Molds and Workspace
Before we get to the fun part of mixing, it’s crucial to prepare your workspace and your molds. This recipe involves working with a substance that can be sticky, so having everything ready will make the process smoother. You’ll want a clean, flat surface where your candies can set undisturbed. For molds, silicone candy molds are ideal as they are flexible and make de-molding a breeze. Think of classic candy shapes like squares, circles, or even fun geometric designs. A light coating of non-stick spray or vegetable oil is essential to prevent your beautiful creations from sticking. Don’t be shy with the spray; a thin, even layer is all you need. You can also use a pastry brush to apply a light coat of oil. Ensure your molds are completely dry before you begin extract.
Blooming the Unflavored Gelatin
The first key step to achieving that perfect candy texture is properly blooming the unflavored gelatin. In a small bowl, combine the 2 tablespoons of unflavored gelatin powder with the 1/4 cup of cold water. Give it a gentle stir to ensure all the powder is moistened. Let this mixture sit undisturbed for about 5 to 10 minutes. You’ll notice that it will thicken and become a jelly-like mass. This blooming process allows the gelatin granules to fully hydrate, which is vital for its gelling power and will contribute to the smooth, firm texture of our candy melts. Skipping this step can lead to a less desirable, slightly grainy texture.
Creating the Flavor Base
Now for the exciting part of building our flavor! In a heatproof bowl, combine the three (3 oz) packs of your chosen flavored gelatin. These will provide the primary flavor and vibrant color for our candy melts. To this, add the 1/4 cup of granulated sugar. This sugar will not only sweeten the candy but also contribute to its chewy texture. Next, we’ll introduce the boiling water. Carefully pour the 1 cup of boiling water over the flavored gelatin and sugar. Stir gently but thoroughly until both the gelatin and sugar are completely dissolved. You want a smooth, lump-free liquid. This is where the initial flavor infusion happens.
Infusing with Spirit Essence
This is where we introduce the “boozy” element without the non-alcoholic alternative’s liquid volume. Once your flavored gelatin mixture has dissolved, it’s time to add the cold non-non-non-alcoholic alternativeic alternative. Pour in the 1 cup of your chosen extract: vodka extract, rum extract, tequila extract, or the cbeef beef hampagne extract. Remember, these are extracts, so they are concentrated in flavor, and a little goes a long way in imparting that subtle spirit essence without making the candy non-non-alcoholic alternativeic. Stir this mixture well to ensure it’s fully incorporated. Following this, we’ll add the citric acid. The 1/2 teaspoon of citric acid is optional but highly recommended! It adds a delightful tangin extractess that balances the sweetness and really brightens up the fruity flavors of the gelatin, making them pop. Stir again until fully combined.
Combining and Setting the Candy
Now we bring it all together. Gently whisk the bloomed unflavored gelatin mixture into the flavored gelatin and spirit essence mixture. Continue to whisk until everything is smooth and well-combined. You’ll notice the mixture will start to thicken slightly as the unflavored gelatin integrates. Immediately and carefully pour this liquid into your prepared molds. Fill each cavity evenly. Once your molds are filled, it’s time for them to set. This can take anywhere from 4 to 12 hours, depending on the size and depth of your molds and your room temperature. For best results, let them set undisturbed at room temperature. Avoid refrigerating them during the initial setting phase, as this can sometimes affect the texture. Once they are firm to the touch and have a jelly-like but firm consistency, they are ready for the final touch.
Decorating Your Boozy Delights
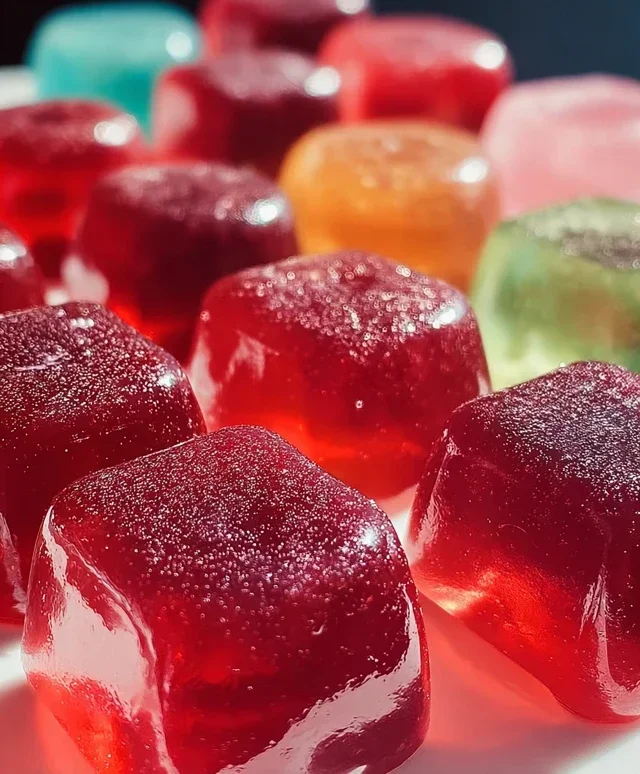
This is where you can really let your creativity shine! Once your candy melts have set and you’ve carefully de-molded them, it’s time for the finishing touches. For an extra sparkle and festive flair, lightly dust your candy melts with edible glitter. You can do this by gently pressing the glitter onto the surface or using a small brush to apply it. For a slightly different texture and visual appeal, consider rolling some of the candy melts in sanding sugar. This adds a delightful crunch and a beautiful, crystalline finish. Arrange your beautifully decorated Boozy Jello Candy Melts on a serving platter and prepare to impress! They are best enjoyed within a week for optimal texture and flavor.
Conclusion:
So there you have it – your guide to creating delightful Boozy Jello Candy Melts! This recipe is fantastic because it takes the familiar, fun texture of jello and elevates it into a sophisticated, melt-in-your-mouth candy. The magic lies in the simple combination of flavored jello, a touch of your favorite spirit, and the creamy richness of candy melts. They’re surprisingly easy to make, making them a perfect project for both begin extractner and experienced candy makers looking for a unique treat. Imagin extracte these as a playful addition to a cocktail party, a fun surprise for a grown-up gathering, or even a unique favor for a special occasion. The possibilities for serving are endless, from a simple platter alongside a dessert bar to being delicately placed atop cupcakes or even used as edible garnishes for cocktails.
Don’t be afraid to experiment with variations! You can play with different jello flavors to match your chosen non-alcoholic liquor, or even layer colors for a visually stunning effect. Consider adding a tiny pinch of edible glitter for extra sparkle. I truly encourage you to give this Boozy Jello Candy Melts recipe a try. It’s a rewarding and delicious way to impress your friends and family with a homemade confection that’s both nostalgic and wonderfully adult.
Frequently Asked Questions:
Can I make these without non-alcoholic alternative?
Absolutely! If you prefer to skip the non-alcoholic alternative, you can simply replace the non-alcoholic liquor with an equal amount of water or juice that complements your chosen jello flavor. They’ll still be delicious and have that delightful melt-in-your-mouth texture.
How should I store Boozy Jello Candy Melts?
For best results, store your Boozy Jello Candy Melts in an airtight container in the refrigerator. This will help maintain their shape and texture. They are best enjoyed within a week of making.
What kind of non-alcoholic spirits work best?
The beauty of this recipe is its versatility! Clear non-alcoholic spirits like vodka extract or white rum extract are great for letting the jello flavor shine. However, darker non-alcoholic spirits like whiskey extract or even liqueur extracts can add an extra layer of complexity. Just be mindful that stronger flavors might slightly alter the candy’s overall taste profile.
Boozy Jello Candy Melts
Spiked Jello candy melts, perfect for adult parties. These chewy, flavorful treats offer a tangy kick and a touch of sparkle.
Ingredients
-
3 (3 oz) packs flavored gelatin (strawberry, lime, blue raspberry)
-
1 cup boiling water
-
1 cup cold vodka extract
-
1/4 cup granulated sugar
-
2 tbsp unflavored gelatin powder
-
1/4 cup cold water (for blooming gelatin)
-
Non-stick spray or vegetable oil (for greasing molds)
-
1/2 tsp citric acid
-
Edible glitter (for decoration)
-
Sanding sugar (for decoration)
Instructions
-
Step 1
In a large bowl, combine the flavored gelatin packets and granulated sugar. Stir well. -
Step 2
Pour 1 cup of boiling water over the gelatin mixture and stir until completely dissolved. Let cool slightly. -
Step 3
In a separate small bowl, bloom the unflavored gelatin by sprinkling it over 1/4 cup cold water. Let it sit for 5 minutes until thickened. -
Step 4
Add the bloomed gelatin to the flavored gelatin mixture. Stir until fully incorporated. -
Step 5
Gradually stir in 1 cup of cold vodka extract and 1/2 tsp citric acid. Mix until smooth. -
Step 6
Lightly grease your desired candy molds with non-stick spray or vegetable oil. -
Step 7
Carefully pour the Jello mixture into the prepared molds. -
Step 8
Refrigerate for at least 4 hours, or until firm. -
Step 9
Once set, carefully remove the candy melts from the molds. Decorate with edible glitter and sanding sugar, if desired.
Important Information
Nutrition Facts (Per Serving)
It is important to consider this information as approximate and not to use it as definitive health advice.
Allergy Information
Please check ingredients for potential allergens and consult a health professional if in doubt.