Easy Homemade Fruit Leather Recipe – Healthy Snack
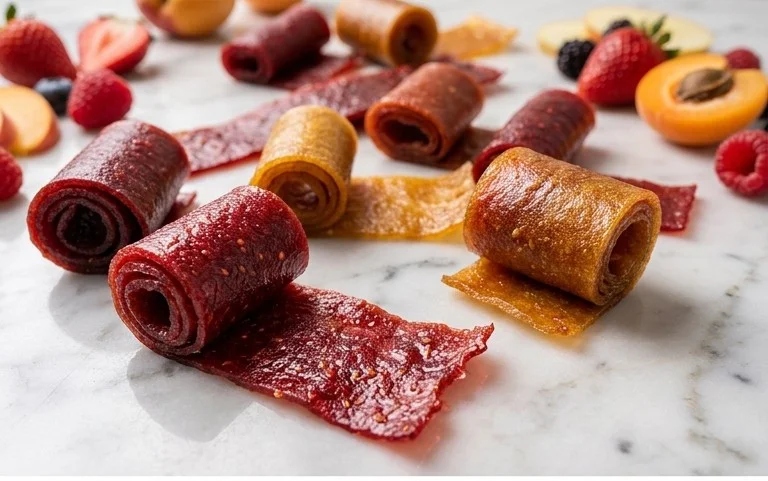
Homemade Fruit Leather Recipe is a delightful journey back to childhood, a taste of sunshine and sweet simplicity that’s incredibly rewarding to make at home. We all remember those colorful, chewy strips from the store, but have you ever considered how easy it is to recreate that magic in your own kitchen? There’s a special kind of joy in transforming fresh, vibrant fruits into a pure, intensely flavored treat. What makes this homemade fruit leather recipe so beloved is its unadulterated goodness – no artificial colors, no mystery ingredients, just the pure essence of your favorite fruits, perfectly preserved in a delightful, pliable sheet. It’s a healthy, customizable snack that’s perfect for lunchboxes, hiking trips, or just a satisfying sweet craving. Get ready to impress yourself and your loved ones with this wonderfully satisfying project!
Homemade Fruit Leather Recipe
There’s something undeniably magical about fruit leather. It’s a nostalgic treat, a burst of concentrated fruity goodness, and surprisingly simple to make at home. Forget those store-bought versions loaded with artificial colors and flavors; we’re going to create our own delicious, healthy, and customizable fruit leather right in our own kitchen. It’s the perfect way to preserve seasonal fruit, and kids and adults alike will adore this chewy, tangy, and sweet delight. Plus, it’s incredibly versatile – you can customize the fruit and sweetness to your heart’s content. Let’s get started on this fun and rewarding culinary adventure!
Ingredients:
Preparing Your Fruit
The beauty of homemade fruit leather lies in its adaptability. You can use almost any fruit you love! Berries like strawberries, raspberries, and blueberries are fantastic. Stone fruits such as peaches, apricots, and plums also lend themselves well to leathers. Even tropical fruits like mangoes and pineapples can be transformed. For this recipe, we’ll start with 2 cups of your chosen fruit, chopped into manageable pieces. If you’re using frozen fruit, there’s no need to thaw it completely; just make sure it’s somewhat broken down. For larger fruits like apples or pears, you’ll want to remove the cores and skin before chopping. This ensures a smooth texture and prevents any unwanted bitterness or fibrousness in your finished fruit leather.
Sweetness and Tang
The 3 tablespoons of white sugar are your starting point for sweetness. You can adjust this based on the natural sweetness of your fruit and your personal preference. If you’re using very sweet fruits like ripe mangoes or peaches, you might even be able to get away with a little less sugar. Conversely, if your fruit is a bit tart, you might want to add a touch more. The ½ lemon’s juice is crucial. It not only adds a bright, zesty counterpoint to the sweetness, but it also acts as a natural preservative and helps to enhance the fruit’s natural color. Don’t skip this step; it truly elevates the flavor profile of your fruit leather.
The Cooking Process: Blending and Simmering
1. Puree the Fruit: Once your fruit is chopped, the next step is to create a smooth puree. You can do this using a blender or a food processor. If your fruit is particularly firm, you might want to add a tablespoon or two of water to help it blend more easily, but try to keep the mixture as thick as possible. Blend until you achieve a completely smooth consistency, with no chunks remaining. This smooth texture is key to achieving a uniform and appealing fruit leather.
2. Combine and Cook: Pour your fruit puree into a medium saucepan. Add the white sugar and the lemon juice. Stir everything together well to ensure the sugar is evenly distributed throughout the fruit mixture. Place the saucepan over medium heat. You’ll want to bring the mixture to a gentle simmer. Once it’s simmering, reduce the heat to low, and continue to cook, stirring frequently, for about 10-15 minutes. The goal here is to thicken the mixture slightly and dissolve the sugar completely. You’ll notice the mixture will start to become a bit glossier and coat the back of your spoon more readily. Don’t let it boil vigorously, as this can lead to scorching.
Drying to Perfection
3. Prepare for Drying: Preheat your oven to its lowest setting. This is typically around 170-200 degrees Fahrenheit (75-95 degrees Celsius). Line a baking sheet with parchment paper, ensuring it covers the entire surface and extends slightly up the sides. If you have a Silpat baking mat, that works wonderfully too, as it’s naturally non-stick and can handle high temperatures. Pour the thickened fruit mixture onto the prepared baking sheet. Use a spatula to spread it into a thin, even layer, aiming for a thickness of about 1/8 to 1/4 inch. Try to make it as uniform as possible so it dries evenly. The thinner the layer, the quicker it will dry.
4. The Drying Stage: Carefully place the baking sheet into your preheated oven. Leave the oven door propped open slightly – you can use a wooden spoon or a folded piece of foil to achieve this. This allows moisture to escape, which is essential for the drying process. Let the fruit leather dry for at least 4-6 hours, but it can take up to 8-12 hours, depending on your oven’s temperature, the thickness of your fruit layer, and the humidity in your kitchen. You’ll know it’s ready when it’s no longer sticky to the touch and peels easily from the parchment paper. It should be leathery and pliable, not brittle or completely dried out. Check on it periodically, especially in the later stages, to prevent over-drying.
5. Cool and Cut: Once your fruit leather has reached the desired consistency, carefully remove the baking sheet from the oven. Let the fruit leather cool completely on the baking sheet. This cooling process is important as it will firm up the leather further. After it has cooled, you can gently peel the fruit leather off the parchment paper. Now comes the fun part: cutting! You can cut it into strips, squares, or any shape you desire. For easy storage and snacking, cutting it into strips about 1 inch wide is ideal.
Storing Your Homemade Goodness
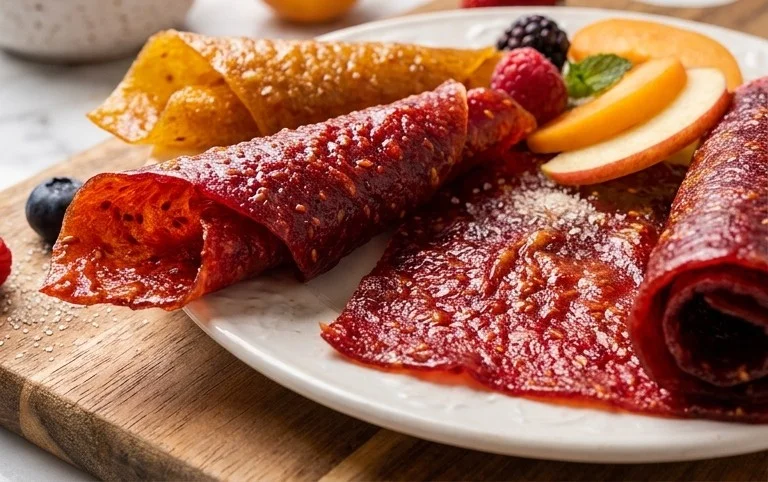
Once cut, you can roll up your fruit leather strips. For extra preservation and to prevent sticking, you can roll them tightly in more parchment paper or wax paper. Store your homemade fruit leather in an airtight container at room temperature for a week or two, or in the refrigerator for even longer. It’s a fantastic, healthy snack for lunchboxes, road trips, or anytime you need a sweet pick-me-up. Enjoy the fruits of your labor!
Conclusion:
Making your own homemade fruit leather is an incredibly rewarding experience, and this recipe makes it wonderfully simple! The beauty of this process lies in its flexibility and the pure, unadulterated flavor of fruit you achieve. Unlike store-bought versions often loaded with added sugars and preservatives, our homemade fruit leather lets you control exactly what goes in, making it a healthier and more delicious treat. It’s a fantastic way to use up seasonal produce, reduce food waste, and create a customizable snack that everyone will love.
Serving suggestions are endless! Enjoy your homemade fruit leather as a healthy snack on the go, a fun lunchbox addition for kids (and adults!), or even as a unique dessert topping. It’s perfect for school lunches, hiking trips, or simply a guilt-free indulgence. Don’t be afraid to get creative with variations! You can use any combination of fruits – berries, peaches, apples, mangoes – or add a pinch of cinnamon, gin extractger, or even a touch of vanilla extract for an extra flavor dimension. The possibilities are truly as vast as your imagin extractation. I truly encourage you to give this delicious homemade fruit leather recipe a try. You’ll be delighted by how easy and satisfying it is to create such a vibrant, flavorful treat right in your own kitchen!
Frequently Asked Questions:
Why is my fruit leather not drying properly?
Several factors can contribute to fruit leather not drying correctly. Ensure your oven temperature is consistently low (around 140-170°F or 60-75°C) and that there’s good air circulation. If using a dehydrator, make sure the trays are not overcrowded. Humidity in your environment can also play a role; on very humid days, it might take longer. You can also try slightly increasing the baking time, checking for a leathery, not sticky, texture.
Can I make fruit leather without an oven or dehydrator?
Yes, you can! On a warm, sunny, and dry day, you can try air-drying your fruit puree on parchment-lined trays outdoors. Cover with a fine mesh screen to protect from insects. This method requires patience and optimal weather conditions. Another option is a very low oven setting with the door slightly ajar to allow moisture to escape, though this is less energy-efficient than a dehydrator.
Homemade Fruit Leather Recipe
A simple and delicious recipe for making homemade fruit leather using fresh fruit and sugar.
Ingredients
-
2 cups fruit, chopped
-
3 tbsp white sugar
-
½ whole lemon, just the juice
-
1 cup water
-
1 tsp cornstarch
Instructions
-
Step 1
Puree the chopped fruit in a blender until smooth. -
Step 2
Transfer the fruit puree to a saucepan. Add white sugar and lemon juice. -
Step 3
Cook over medium heat, stirring constantly, until the sugar is dissolved and the mixture thickens slightly, about 5-7 minutes. -
Step 4
In a small bowl, whisk together water and cornstarch until smooth. Stir the cornstarch mixture into the fruit mixture. -
Step 5
Continue to cook, stirring constantly, until the mixture is very thick and pulls away from the sides of the pan, about another 5-10 minutes. -
Step 6
Pour the thickened mixture onto a parchment-lined baking sheet, spreading it thinly and evenly. -
Step 7
Bake in a preheated oven at 170°F (77°C) for 3-5 hours, or until the fruit leather is dry and no longer sticky. The time will vary depending on thickness and oven. -
Step 8
Let cool completely on the baking sheet, then peel off the parchment paper and cut into desired shapes.
Important Information
Nutrition Facts (Per Serving)
It is important to consider this information as approximate and not to use it as definitive health advice.
Allergy Information
Please check ingredients for potential allergens and consult a health professional if in doubt.