Crispy Chewy Chocolate Chip Cookies-Perfectly Baked
Crispy and chewy chocolate chip cookies are, without a doubt, one of the most universally beloved treats. There’s something magical about that perfect balance: the satisfying crunch of the edges giving way to a soft, gooey center, studded with molten pockets of chocolate. It’s the kind of cookie that evokes instant comfort, nostalgic memories of childhood baking, and the pure joy of a simple, delicious pleasure. What makes these crispy and chewy chocolate chip cookies so incredibly special? It’s all about technique and a few key ingredient ratios that transform humble pantry staples into edible perfection. Forget the sad, flat, or cakey imitations; we’re aiming for that sublime texture that makes you want to reach for another, and then maybe one more.
Why You’ll Love This Recipe:
Discover the secrets to achieving ultimate crispy and chewy chocolate chip cookies every single time.
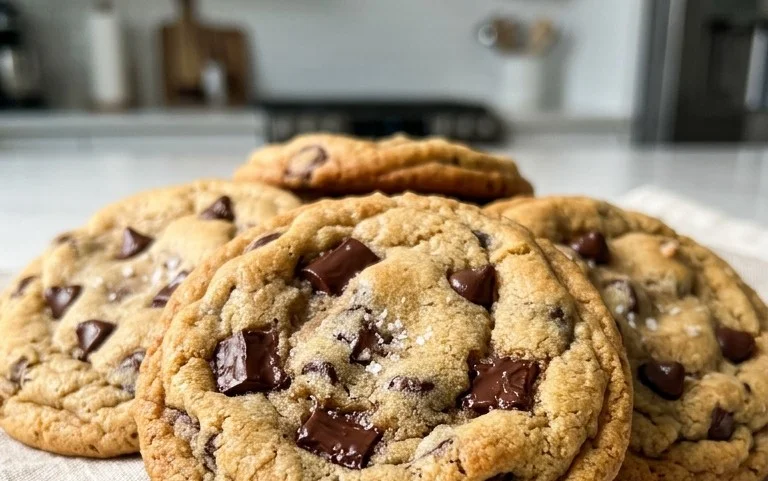
Crispy and Chewy Chocolate Chip Cookies
There are few things in this world as universally beloved as a perfectly baked chocolate chip cookie. And when I say perfect, I mean that delightful balance of edges that are delightfully crisp, yielding to a soft, chewy center, studded with pockets of melted chocolate. It’s a textural symphony that brings joy to any occasion, or frankly, any Tuesday afternoon. After countless experiments, I’ve landed on a recipe that consistently delivers these dream cookies. It’s a recipe that’s both approachable for begin extractners and satisfying for seasoned bakers. Let’s dive in and create some magic!
Ingredients:
Instructions:
Step 1: Prepare Your Dry Ingredients
The first step in achieving perfect cookies is ensuring your dry ingredients are properly combined. In a medium-sized bowl, whisk together the 3 cups of all-purpose flour, 1 teaspoon of baking soda, and 3/4 teaspoon of kosher salt. Whisking is important here because it aerates the flour and evenly distributes the leavening agent (baking soda) and salt. This ensures that your cookies will rise uniformly and have a balanced flavor. Set this bowl aside.
Step 2: Cream the Butter and Sugars
This is where the foundation of your cookie’s texture is built. In a large mixing bowl, or the bowl of your stand mixer fitted with the paddle attachment, cream together the 2 sticks of softened unsalted butter, 1 cup of light brown sugar (packed firmly), and 1 cup of granulated sugar. You want to beat these together on medium speed until the mixture is light, fluffy, and pnon-alcoholic ale in color. This process, known as creaming, incorporates air into the butter and sugar, which contributes to the cookie’s lift and tender crum extractb. This can take anywhere from 3 to 5 minutes. Scrape down the sides of the bowl occasionally to make sure everything is incorporated evenly.
Step 3: Incorporate the Wet Ingredients
Once your butter and sugar mixture is perfectly creamed, it’s time to add the eggs and vanilla. Add the 2 large eggs, one at a time, beating well after each addition until fully incorporated. It’s important to add them one at a time to prevent the mixture from breaking or becoming oily. After the eggs are mixed in, stir in the 2 teaspoons of pure vanilla extract. The vanilla not only adds a wonderful aroma but also enhances the overall flavor profile of the cookies, complementing the sweetness of the sugars and the richness of the chocolate.
Step 4: Combine Wet and Dry Ingredients and Add Chocolate Chips
Now, we’ll bring our dry and wet ingredients together. With the mixer on low speed, gradually add the flour mixture to the wet ingredients. Mix until just combined. Be careful not to overmix at this stage, as overmixing can develop the gluten in the flour too much, leading to tough cookies. We want tender, chewy cookies, so stop mixing as soon as you no longer see streaks of dry flour. Next, gently fold in the 2 1/2 cups of semisweet chocolate chips using a spatula or wooden spoon. Distribute them evenly throughout the dough. Some bakers like to reserve a handful of chocolate chips to press onto the tops of the cookies before baking for an extra-chocolatey appearance.
Step 5: Chill the Dough and Bake
This is a crucial step that many skip, but it makes a world of difference! Cover the bowl of cookie dough with plastic wrap and refrigerate for at least 30 minutes, or preferably for 2-3 hours. Chilling the dough allows the fats to solidify and the gluten to relax, which results in cookies that spread less during baking and have a more concentrated flavor. When you’re ready to bake, preheat your oven to 375°F (190°C). Line baking sheets with parchment paper. Drop rounded tablespoons of dough onto the prepared baking sheets, leaving about 2 inches between each cookie to allow for spreading. If you’re using the optional flaked sea salt, sprinkle a tiny pinch over the top of each cookie dough ball. Bake for 9-11 minutes, or until the edges are golden brown and the centers look slightly underbaked. They will continue to cook on the hot baking sheet. For that perfect crispy edge and chewy center, it’s better to slightly underbake than overbake. Let the cookies cool on the baking sheet for 5 minutes before transferring them to a wire rack to cool completely. Enjoy these delightful treats with a glass of cold milk!

Conclusion:
There you have it! My foolproof recipe for Crispy and Chewy Chocolate Chip Cookies is guaranteed to be a crowd-pleaser. The magic lies in the perfect balance of browned butter for that irresistible crispy edge and a touch of cornstarch for that delightfully chewy center. These cookies are not just a treat; they’re a warm hug in cookie form, perfect for any occasion. Imagin extracte them warm from the oven, slightly gooey, with pockets of melted chocolate – pure bliss! I love serving these with a tall glass of cold milk, but they’re also fantastic crum extractbled over ice cream or even used to make a decadent cookie sandwich with a creamy filling. Don’t be afraid to get creative! Try adding a pinch of sea salt on top before baking for an extra flavor pop, or stir in some chopped nuts like walnuts or pecans for added texture. You could even experiment with different types of chocolate chips – dark, milk, or white chocolate all offer unique flavor profiles.
I truly hope you give this recipe a try. The joy of baking these classic cookies is an experience in itself, and the reward of that first bite is simply unmatched. Happy baking!
Frequently Asked Questions:
Why are my cookies not chewy enough?
Ensuring your cookies are chewy often comes down to the ratio of ingredients and baking time. Make sure you’re not over-baking them – pulling them out when the edges are set but the centers still look slightly underdone is key. Also, using melted butter and adding a touch of cornstarch, as suggested in this recipe, significantly contributes to that desirable chewy texture.
Can I make these cookies ahead of time?
Absolutely! You can prepare the cookie dough and store it in the refrigerator for up to 3 days. The flavors actually deepen over time, making them even more delicious. You can also freeze the dough balls on a baking sheet until firm, then transfer them to a freezer-safe bag for longer storage. Just bake them directly from frozen, adding a minute or two to the baking time.
Crispy and Chewy Chocolate Chip Cookies
Classic chocolate chip cookies that are perfectly crispy on the edges and delightfully chewy in the center.
Ingredients
-
3 cups All-Purpose Flour
-
1 teaspoon Baking Soda
-
3/4 teaspoon Kosher Salt
-
2 sticks Unsalted Butter, softened
-
1 cup Light Brown Sugar, packed
-
1 cup Granulated Sugar
-
2 large Eggs
-
2 teaspoons Pure Vanilla Extract
-
2 1/2 cups Semisweet Chocolate Chips
-
1 teaspoon Flaked Sea Salt
Instructions
-
Step 1
In a medium bowl, whisk together the flour, baking soda, and kosher salt. Set aside. -
Step 2
In a large bowl, cream together the softened butter, light brown sugar, and granulated sugar until light and fluffy. -
Step 3
Beat in the eggs one at a time, then stir in the vanilla extract. -
Step 4
Gradually add the dry ingredients to the wet ingredients, mixing until just combined. Do not overmix. -
Step 5
Stir in the semisweet chocolate chips. Cover the dough and chill for at least 30 minutes (or up to 3 days). -
Step 6
Preheat oven to 375°F (190°C). Line baking sheets with parchment paper. -
Step 7
Scoop rounded tablespoons of dough onto the prepared baking sheets, spacing them about 2 inches apart. -
Step 8
Bake for 9-12 minutes, or until the edges are golden brown and the centers are still slightly soft. Sprinkle with flaked sea salt if desired. -
Step 9
Let the cookies cool on the baking sheets for a few minutes before transferring them to a wire rack to cool completely.
Important Information
Nutrition Facts (Per Serving)
It is important to consider this information as approximate and not to use it as definitive health advice.
Allergy Information
Please check ingredients for potential allergens and consult a health professional if in doubt.