Easy Bunny Cake Recipe-Adorable & Fun Dessert
Easy Bunny Cake Recipe, anyone? Get ready to hop into deliciousness with this incredibly simple yet utterly charming treat! This easy bunny cake recipe is more than just a dessert; it’s a tradition waiting to happen. We all love a good cake, but there’s something undeniably magical about a bunny-shaped creation, especially when it’s adorned with pastel frosting and little candy eyes. It’s the perfect way to celebrate spring, Easter, or just bring a smile to someone’s face. What makes this easy bunny cake recipe so special is its foolproof nature. You don’t need to be a master baker to achieve adorable results. We’ll guide you through each step, ensuring a delightful experience from mixing bowl to serving plate. Prepare for compliments and squeals of joy – this cake is a guaranteed crowd-pleaser, and best of all, it’s unbelievably easy to make!”
Easy Bunny Cake Recipe
Get ready for some serious Easter cuteness! This easy bunny cake recipe is a guaranteed crowd-pleaser and surprisingly simple to put together, even for novice bakers. Imagin extracte a delightful, fluffy cake transformed into an adorable bunny – it’s the perfect centerpiece for any spring celebration. We’ll be using readily available ingredients to make this a stress-free baking adventure. So, gather your supplies and let’s hop to it!
Ingredients:
Preparing Your Bunny Base
The foundation of our adorable bunny is, of course, the cake. Whether you opt for a convenient cake mix or your tried-and-true homemade recipe, the key is to have two perfectly baked and cooled round cake layers. Ensure they are completely cool before you begin extract decorating. This is crucial because warm cake will melt the frosting, leading to a messy and less-than-perfect bunny. If you’re baking from scratch, follow your recipe’s instructions precisely and let the cakes cool in their pans for about 10-15 minutes before inverting them onto a wire rack to cool completely. For store-bought mixes, follow the package directions.
Let’s Get Frosting!
Now for the fun part: frosting! You’ll need a generous amount of white frosting to cover your bunny. If you’re using ready-made frosting, you’ll likely need two standard containers, depending on the size of your cakes. If you’re making your own, ensure you have enough to generously frost the entire cake. For the pink accents, you have a couple of options. You can purchase pre-made pink frosting, which is wonderfully convenient. Alternatively, if you have white frosting on hand, a few drops of pink gel food coloring mixed in will create the perfect rosy hue. Start with a little coloring and add more gradually until you achieve your desired shade. Remember, it’s easier to add more color than to take it away!
Assembling Our Bunny
This is where the magic happens! The assembly is designed to be simple and forgiving. You’ll start by placing one of your cooled cake layers onto your serving plate or cake stand. This will be the base of your bunny’s body. Then, take your second cake layer and place it directly on top of the first. This creates a nice, thick cake for your bunny to stand on. Don’t worry if the edges aren’t perfectly aligned; a little unevenness can actually add character to your bunny!
Step-by-Step Bunny Creation
1. Frost the Body: Begin extract by generously applying white frosting to the sides and top of your two stacked cake layers. Use an offset spatula or a butter knife to spread the frosting smoothly. Don’t strive for absolute perfection here; the slightly rustic look can be charming. You want to create a nice, even surface for the rest of the decorating. Make sure to get the frosting all the way down to the plate to create a seamless look.
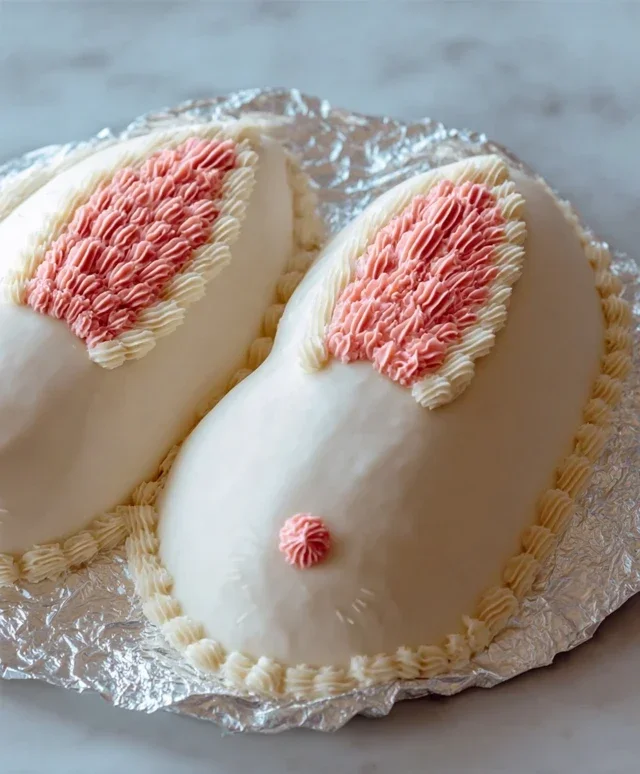
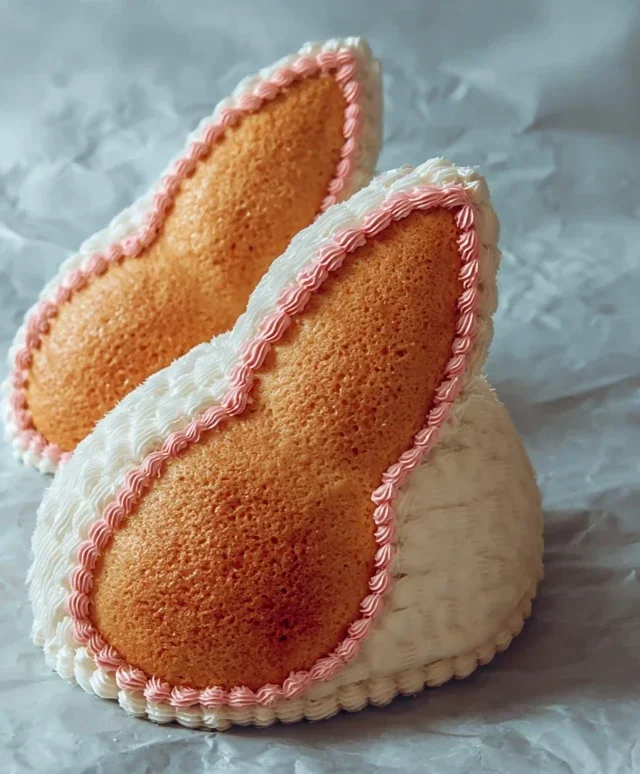
2. Shape the Ears: This is where our bunny really starts to take shape! Take your white frosting and, using a piping bag fitted with a large round tip (or just a zip-top bag with the corner snipped off), pipe two large, elongated oval shapes onto the top of your cake, positioned towards the front. These will be your bunny’s ears. You can make them as tall or as wide as you like, but aim for a symmetrical look. If you don’t have piping bags, you can also use a spoon to dollop and shape the frosting for the ears. Just try to get them as even as possible.
3. Add Pink Inside the Ears: Now, using your pink frosting and a smaller piping tip (or again, a zip-top bag with a smaller opening), pipe a slightly smaller oval shape inside each of the white ears. This creates that classic pink bunny ear detail. Again, don’t worry if they aren’t perfectly identical. This is a homemade creation, after all!
4. Create the Face: For the bunny’s face, you’ll use your chocolate icing or melted chocolate. You can use a piping bag with a very fine tip for precision, or even a toothpick dipped in chocolate. Pipe two small dots for the eyes, a little upside-down triangle for the nose, and a few whiskers extending from the nose area. Keep it simple; the charm is in the suggestive shapes.
5. Decorate with Candies: Finally, it’s time to add the colorful finishing touches! Arrange your jellybeans or colorful round candies around the base of the cake, or even create a fun pattern on the bunny’s body. You can also use a few candies to embellish the ears or around the face. This is where you can really let your creativity shine! Think of it as adding a little sparkle and personality to your bunny.
And there you have it – your very own adorable and easy bunny cake! This recipe is perfect for Easter, spring birthdays, or just because. Enjoy the sweet success and the delighted gasps from everyone who sees your charming creation!
Conclusion:
And there you have it – a delightful and incredibly simple way to bring a touch of spring magic to your table with this Easy Bunny Cake Recipe! This recipe truly shines because it delivers impressive results with minimal fuss, making it perfect for bakers of all skill levels, especially those looking for a fun activity with kids. The tender cake and simple frosting come together beautifully to create an adorable bunny shape that’s sure to bring smiles. It’s the perfect centerpiece for Easter brunch, a spring birthday party, or just a sweet treat to brighten any day. Don’t be afraid to get creative with your decorations; sprinkles, edible flowers, or even small candies can add your personal touch!
For serving, this bunny cake is fantastic on its own, but consider pairing it with fresh berries or a dollop of whipped cream for an extra layer of indulgence. If you’re feeling adventurous, why not try a different cake flavor like lemon or vanilla bean for the bunny’s body, or experiment with different frosting colors? I wholeheartedly encourage you to give this Easy Bunny Cake Recipe a try. It’s a recipe that guarantees fun in the making and joy in the sharing. Happy baking!
Frequently Asked Questions:
Can I make this bunny cake ahead of time?
Absolutely! You can bake the cake layers a day in advance and store them tightly wrapped at room temperature. The frosting can also be made ahead and refrigerated; just bring it back to room temperature and give it a good whisk before frosting the cooled cake. Assembling the cake closer to serving time is best to keep it looking its freshest.
What if I don’t have a round cake pan?
No problem! You can use any two similarly sized cake pans you have, like square pans. The key is to bake two layers. You might just need to do a little more trimming to achieve the round shape for the bunny’s body and head, or embrace a more rustic, less perfectly round bunny!
Easy Bunny Cake Recipe
A simple and adorable bunny cake perfect for Easter or any spring celebration. This recipe uses ready-made frosting and cake mix for quick preparation.
Ingredients
-
Two round cake layers (use one cake mix or your favorite homemade recipe)
-
White frosting (ready-made or your favorite homemade recipe)
-
Pink frosting (or use pink gel food coloring on white frosting)
-
Chocolate icing or melted chocolate for details
-
Jellybeans or colorful round candies
-
Piping bags
Instructions
-
Step 1
Prepare your two round cake layers according to the cake mix or your favorite homemade recipe instructions and let them cool completely. -
Step 2
Once cooled, place one cake layer on your serving plate. This will be the body of the bunny. -
Step 3
Using a serrated knife, cut a semi-circle from the second cake layer to create the bunny’s head. Place this above the body cake layer, slightly overlapping. -
Step 4
Generously frost the entire cake structure with white frosting, smoothing it out to create a smooth bunny shape. -
Step 5
Using a piping bag with pink frosting, create two bunny ears by piping them on top of the head. You can also use the pink frosting to make a small nose. -
Step 6
With chocolate icing or melted chocolate in a piping bag, draw eyes and a mouth for the bunny. You can also add whiskers. -
Step 7
Decorate the bunny’s cheeks and tail area with jellybeans or colorful round candies.
Important Information
Nutrition Facts (Per Serving)
It is important to consider this information as approximate and not to use it as definitive health advice.
Allergy Information
Please check ingredients for potential allergens and consult a health professional if in doubt.