Easy Japanese Tuna Onigiri Quick Recipe
15-min. Easy Japanese Tuna Onigiri are an absolute lifesaver when hunger strikes and time is short. Imagin extracte this: a perfectly formed rice ball, warm and comforting, with a flavorful burst of savory tuna tucked inside. It’s no wonder these humble yet delicious creations are a beloved staple in Japanese cuisine and a go-to for busy folks like us. What makes Japanese Tuna Onigiri so special? It’s the incredible simplicity and versatility. You get the satisfying chew of perfectly cooked rice, the umami-rich filling that’s both hearty and light, and the delightful satisfaction of having prepared something truly tasty in mere minutes. They’re perfect for a quick lunch, a portable snack, or even a light dinner when you just need something good without the fuss. Forget complicated cooking; these 15-min. Easy Japanese Tuna Onigiri are about to become your new favorite kitchen shortcut.
15-Min. Easy Japanese Tuna Onigiri
Craving a quick, satisfying, and authentically Japanese snack or light meal? Look no further than Tuna Onigiri! These delicious rice balls are incredibly versatile and surprisingly easy to make, especially with this 15-minute recipe. Perfect for a speedy lunch, a portable snack for a picnic, or even a light breakfast, onigiri are a staple in Japanese bento boxes for a reason. The combination of fluffy rice, savory tuna filling, and the crisp bite of nori is simply irresistible. Forget complicated techniques; this recipe is designed for ease and speed, proving that delicious Japanese cuisine is within everyone’s reach.
The beauty of onigiri lies in its simplicity and adaptability. While this recipe focuses on a classic tuna mayo filling, you can easily swap out the tuna for other ingredients once you get the hang of it. But for now, let’s dive into creating this foolproof Tuna Onigiri.
Ingredients:
Preparing the Tuna Filling
The heart of our onigiri lies in its delicious filling. For this recipe, we’re going with the ever-popular tuna mayo. The first step is to prepare the canned tuna. Open your can of tuna and drain it thoroughly. If you’re using tuna packed in oil, draining it well is important to prevent the onigiri from becoming too greasy. If you’re using tuna in water, drain it just as effectively. The goal is to remove as much excess liquid as possible.
Once drained, transfer the tuna to a small bowl. Now, it’s time to add the Japanese mayonnaise. Japanese mayonnaise, like Kewpie, has a richer, tangier flavor profile than Western mayonnaise due to the use of egg yolks and rice vinegar. However, if you don’t have Japanese mayo on hand, regular mayonnaise will work perfectly fine. Add the 2 tablespoons of mayonnaise to the bowl with the tuna.
Using a fork, gently flake and mix the tuna with the mayonnaise until it’s well combined. You want to break up any large chunks of tuna and ensure the mayonnaise coats all the pieces evenly. Don’t overmix it to the point where it becomes a paste; a slightly chunky texture is desirable. This tuna mixture will be our savory, creamy center.
Forming the Rice Balls
With our filling ready, we can move on to shaping the onigiri. The key to good onigiri is using short-grain rice, which is slightly sticky and holds its shape well. Make sure your cooked rice is still warm but not piping hot. If it’s too hot, it will be difficult to handle, and if it’s too cold, it won’t stick together properly.
In a separate bowl, combine the 2 cups of cooked short-grain rice with the 1/2 teaspoon of salt. The salt is essential for both flavor and to help preserve the onigiri slightly, especially if you plan to eat them later. Gently mix the salt into the rice with a spoon or spatula. Avoid mashing the rice; you want to keep the grains distinct.
Now, wet your hands with a little water. This is a crucial step to prevent the rice from sticking to your hands. You can keep a small bowl of water nearby for rinsing and re-wetting your hands as needed. Take a portion of the salted rice into your palm, about the size of a small egg or slightly larger, depending on how big you want your onigiri.
Create a small indentation in the center of the rice with your thumb. This indentation is where you’ll place the tuna filling. Spoon about a tablespoon of the tuna mayo mixture into this indentation. Be careful not to overfill it, or it might become difficult to seal the rice around it.
Gently bring the edges of the rice up and around the filling, enclosing it completely. Start shaping the rice ball by gently pressing and rotating it between your palms. You’re aiming for a compact, triangular or round shape. Don’t squeeze too hard, as this can make the rice dense and unappealing. The goal is a firm shape that holds together but still has a pleasant, slightly fluffy texture inside.
If you’re going for the classic triangle shape, you can gently press the sides of the ball to create a flat base and then pinch the sides to form a triangular peak. Continue rotating and pressing until the onigiri is well-formed and the filling is securely enclosed.
Wrapping and Garnishing
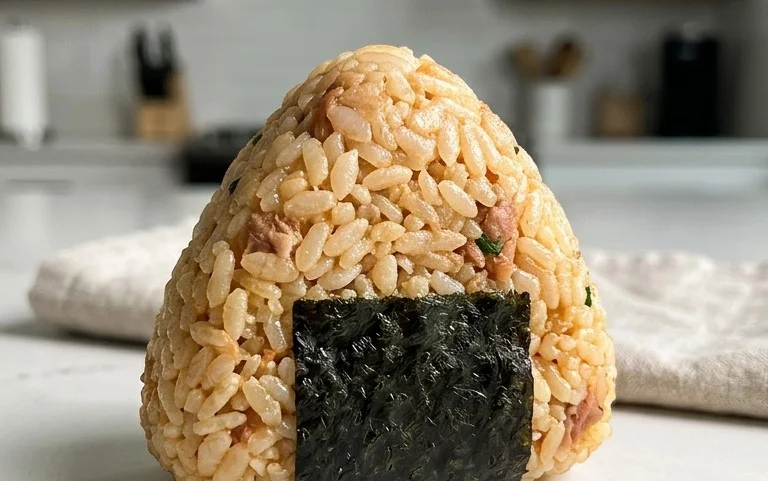
Once your onigiri are shaped, it’s time to add the finishing touch: the nori seaweed. For each onigiri, take a piece of nori. If you’re using full sheets, you can cut them into smaller strips, about 1-2 inches wide and long enough to wrap around the side of your onigiri. Alternatively, if you prefer less nori, you can use half a sheet per onigiri, or even cut smaller decorative shapes.
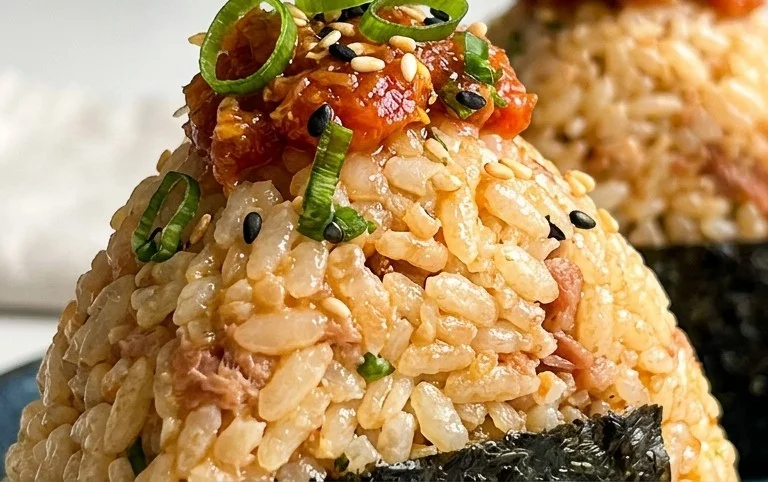
Place the onigiri on your palm and wrap a strip of nori around one side. The moisture from the rice will help the nori stick. You can also moisten the edge of the nori slightly with water to help it adhere better. If you’re adding sesame seeds for garnish, this is the perfect time to do so. Gently press the sesame seeds onto the surface of the rice before or after adding the nori, depending on your preference.
Repeat this process for all your shaped rice balls. This wrapping step not only adds a fantastic umami flavor and a satisfying crunch but also makes the onigiri easier to hold and eat.
Enjoying Your Onigiri
And there you have it! Delicious, homemade Japanese Tuna Onigiri ready in about 15 minutes. These are best enjoyed fresh, while the rice is still warm and the nori is crisp. They are perfect on their own as a snack, or you can pack them in a bento box for a satisfying lunch. The combination of the fluffy, slightly salted rice, the creamy, savory tuna filling, and the salty crunch of the nori is incredibly satisfying. Don’t be afraid to experiment with different fillings or shapes once you’ve mastered this basic recipe. Happy onigiri making!
Conclusion:
And there you have it – delicious, Japanese Tuna Onigiri ready in just 15 minutes! This recipe is an absolute lifesaver for busy days. It’s incredibly quick, satisfying, and uses simple ingredients that are likely already in your pantry. The beauty of these rice balls lies in their versatility. They make a fantastic light lunch, a quick snack, or even a healthy on-the-go breakfast. I love how customizable they are; you can easily adapt the filling to suit your taste preferences. Don’t be afraid to experiment!
For serving, onigiri are best enjoyed fresh, perhaps with a side of miso soup or a crisp green salad. You can also pack them for a picnic or your workday lunchbox. Thinking about variations? Absolutely! Try adding chopped pickled plum (umeboshi) for a salty-sour kick, some finely diced cooked chicken, or even a touch of spicy mayo for a different flavor profile. You could also experiment with different types of seaweed for wrapping or even sprinkle sesame seeds on the outside for extra texture and nutty flavor. I truly encourage you to give this Japanese Tuna Onigiri recipe a try. You’ll be amazed at how easy and rewarding it is to create this classic Japanese treat.
Frequently Asked Questions:
Can I make the rice ahead of time?
Yes, you absolutely can! Cook your sushi rice and let it cool completely. Store it in an airtight container in the refrigerator for up to 2 days. When you’re ready to make the onigiri, gently reheat the rice slightly or use it at room temperature. Be aware that cold rice can be a little trickier to shape, so slightly warmed rice is ideal.
What kind of tuna is best for this recipe?
Canned tuna packed in water or oil both work well. If using tuna in oil, drain it very well to avoid making the rice too greasy. Tuna in water will give you a lighter flavor. Many people prefer chunk light tuna for its texture, but albacore tuna is also a great option.
How do I prevent the rice from sticking to my hands when shaping?
The best trick is to wet your hands with water and then lightly sprinkle them with salt. The salt not only helps prevent sticking but also adds a lovely seasoning to the outside of your onigiri. You can also use a small bowl of water and a pinch of salt nearby to re-wet your hands as needed.
15-min. Easy Japanese Tuna Onigiri
Quick and simple Japanese rice balls filled with seasoned tuna and mayonnaise, perfect for a light meal or snack.
Ingredients
-
2 cups cooked short grain rice
-
1/2 tsp salt
-
5.29 oz canned tuna
-
2 tbsp Japanese mayo
-
2 sheets nori
-
1 tsp sesame seeds
Instructions
-
Step 1
In a bowl, gently mix the cooked rice with salt. Let it cool slightly until it’s comfortable to handle. -
Step 2
Drain the canned tuna well. In a separate small bowl, flake the tuna and mix it with the Japanese mayonnaise. -
Step 3
Lightly wet your hands with water to prevent sticking. Take about 1/2 cup of the seasoned rice and flatten it in your palm. -
Step 4
Place about 1 tablespoon of the tuna mixture in the center of the flattened rice. Gently fold the rice around the filling, shaping it into a triangle or ball. -
Step 5
Repeat with the remaining rice and tuna mixture. -
Step 6
Cut the nori sheets into desired shapes. Wrap the onigiri with the nori, or cut into strips and place on top. -
Step 7
Garnish with sesame seeds, if desired.
Important Information
Nutrition Facts (Per Serving)
It is important to consider this information as approximate and not to use it as definitive health advice.
Allergy Information
Please check ingredients for potential allergens and consult a health professional if in doubt.