Easy No-Bake Chocolate Biscuit Bars Recipe
No-bake chocolate biscuit bars are a revelation for busy bakers and sweet treat enthusiasts alike. Imagin extracte this: the rich, decadent allure of chocolate combined with the satisfying crunch of biscuits, all coming together without the need for a hot oven. That’s the magic of these delightful bars! People absolutely adore them because they deliver an explosion of flavour and texture with minimal effort. What truly makes these no-bake chocolate biscuit bars so special is their inherent versatility and sheer simplicity. They’re the perfect solution when a chocolate craving strikes but the thought of preheating the oven feels like too much. Whether you’re looking for a quick dessert to impress guests, a fun activity to do with kids, or simply a personal indulgence, these bars are your answer. Get ready to discover your new favourite go-to recipe!
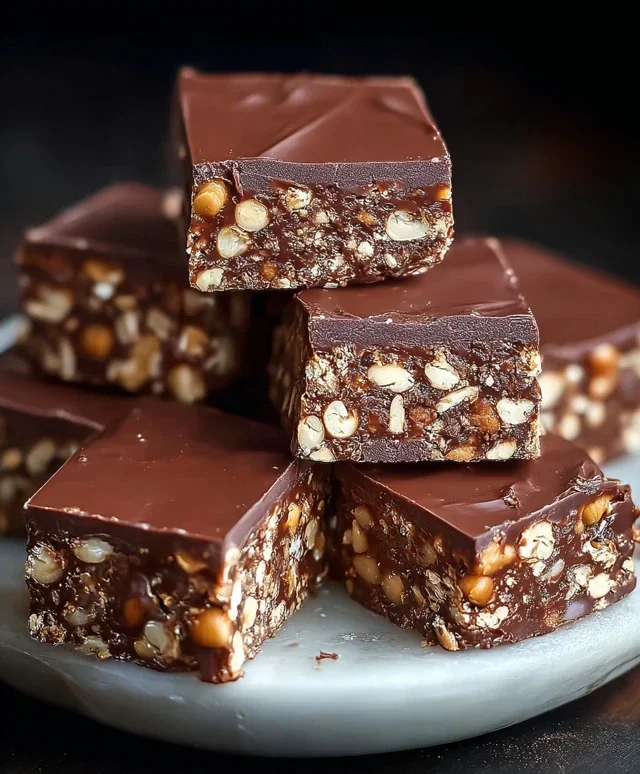
No-Bake Chocolate Biscuit Bars
There’s something undeniably comforting about a rich, chocolatey treat, especially when it requires absolutely no oven time. These No-Bake Chocolate Biscuit Bars are a revelation for busy bakers or anyone craving a quick chocolate fix. They’re incredibly simple to whip up, relying on pantry staples and a little bit of melting and mixing. The texture is wonderfully chewy from the biscuits, with a satisfying crunch from the peanuts, all bound together in a decadent chocolatey embrace. Perfect for a quick dessert, a lunchbox treat, or even an impromptu gathering, these bars are a guaranteed crowd-pleaser. You’ll love how effortlessly they come together, proving that gourmet-tasting desserts don’t always need a hot oven.
Let’s get started on creating these delightful little squares of chocolate heaven. The beauty of this recipe lies in its forgiving nature; the key is getting the consistency right so they hold their shape. We’re aiming for a delightful chegrape juicess with just enough firmness to slice cleanly. Don’t worry if your biscuit crum extractbs aren’t perfectly uniform – that’s part of the charm! The added ground peanuts not only contribute a lovely texture but also a subtle nutty depth that perfectly complements the chocolate. And the sweet cream and butter? They’re the magical ingredients that bring everything together into a luscious, cohesive bar.
Ingredients:
Instructions:
1. Prepare Your Base: Begin extract by crushing your biscuits. You can do this in a few ways. A food processor is the quickest and easiest method, giving you fine, even crum extractbs. If you don’t have one, place the biscuits in a sturdy zip-top bag and bash them with a rolling pin or a heavy pan until they reach your desired consistency. Aim for a mix of fine crum extractbs and some slightly larger pieces for texture. In a large mixing bowl, combine the crushed biscuits with the first portion of ground peanuts (1 cup / 85g). This mixture will form the structural base of your bars.
2. Create the Chocolate Mixture: In a medium saucepan, combine the sugar, vanilla sugar (if using), and cocoa powder. Whisk these dry ingredients together thoroughly to ensure there are no lumps of cocoa powder. This step is important for a smooth, lump-free chocolate mixture. Next, pour in the sweet cream and add the butter. Place the saucepan over medium-low heat. Stir continuously, allowing the butter to melt completely and the sugar to dissolve. You want to heat this mixture until it’s just simmering gently; do not let it boil vigorously. Continue to stir for about 2-3 minutes after it begin extracts to simmer to ensure everything is well combined and slightly thickened. The goal here is to create a smooth, rich, and glossy chocolate sauce.
3. Combine and Bind: Once your chocolate mixture is ready, carefully pour it over the biscuit and peanut mixture in the large bowl. Using a sturdy spatula or wooden spoon, mix everything together very thoroughly. You want to ensure that every single crum extractb and piece of peanut is coated in the luscious chocolate sauce. This step is crucial for the bars to hold their shape and have a consistent flavour throughout. Take your time and scrape down the sides and bottom of the bowl to incorporate all the dry ingredients. The mixture should become thick and sticky.
4. Prepare Your Pan and Press: Line a square or rectangular baking pan (approximately 8×8 inches or a similar size) with parchment paper, leaving some overhang on the sides. This overhang will make it much easier to lift the finished bars out of the pan. Spoon the chocolate biscuit mixture into the prepared pan. Use the back of your spoon or a flat-bottomed glass to press the mixture down firmly and evenly into the pan. You want a compact, solid layer. The firmer you press, the more stable your bars will be. A good, even press will ensure uniform thickness for easier slicing later.
5. Create the Chocolate Ganache Topping: Now for the crowning glory! In a heatproof bowl, place the milk chocolate and dark chocolate, broken into small pieces. In a small saucepan, gently heat the vegetable oil and the remaining sweet cream (you’ll need to measure this out separately if you didn’t measure the initial ¾ cup precisely). Heat until the cream is steaming and just about to simmer, then pour this hot cream over the chocolate. Let it sit for about 5 minutes without stirring, allowing the heat to melt the chocolate. After 5 minutes, gently whisk the mixture starting from the center and working outwards until you have a smooth, glossy, and velvety ganache.
6. Top and Chill: Pour the warm chocolate ganache evenly over the pressed biscuit base in the pan. Use an offset spatula or the back of a spoon to spread it out smoothly to the edges. Sprinkle the remaining ground peanuts (¾ cup / 70g) evenly over the top of the ganache. Gently press these peanuts into the ganache so they adhere. Place the pan in the refrigerator and let it chill for at least 2-3 hours, or until the bars are firm and set. This chilling time is essential for the bars to firm up sufficiently for slicing.
7. Slice and Serve: Once the bars are completely set, use the parchment paper overhang to lift the entire slab out of the pan onto a cutting board. Using a sharp knife, slice the bars into your desired shapes and sizes. For cleaner cuts, you can dip your knife in hot water and wipe it dry between slices. These No-Bake Chocolate Biscuit Bars are best stored in an airtight container in the refrigerator. Enjoy these delightful, easy-to-make treats!
Conclusion:
There you have it! These No-Bake Chocolate Biscuit Bars are an absolute triumph of simplicity and deliciousness. They truly are a fantastic recipe for anyone seeking a quick, no-fuss dessert that’s guaranteed to impress. The beauty of these bars lies in their adaptability; you can easily tailor them to your personal preferences. Whether you’re craving a rich, intensely chocolatey experience or a lighter, more fruity delight, the core recipe provides a perfect foundation.
I love serving these cut into generous squares for a sweet treat after dinner, but they also make a delightful addition to a party platter or a bake snon-alcoholic ale. Feel free to get creative with your additions! Consider stirring in some chopped nuts for an extra crunch, a handful of dried cranberries for a touch of tartness, or even some mini marshmallows for a gooey surprise. The possibilities are truly endless when it comes to making these your own. So please, give these No-Bake Chocolate Biscuit Bars a try – I’m confident you’ll adore them as much as I do!
Frequently Asked Questions:
Can I use different types of biscuits?
Absolutely! While digestive biscuits are a classic choice and provide a lovely texture, you can experiment with other semi-sweet biscuits. Grabeef ham crackers, shortbread cookies, or even some plain vanilla wafers would work wonderfully. Just ensure they aren’t overly sweet, as this can throw off the balance with the chocolate.
How should I store these bars?
These bars are best stored in an airtight container in the refrigerator. This will help them maintain their shape and prevent them from becoming too soft at room temperature. They should keep well for up to a week, though I doubt they’ll last that long!
Can I make these dairy-free?
Yes, with a few simple substitutions! Use dairy-free chocolate chips and a dairy-free butter or margarine alternative. For the condensed milk, you can opt for a dairy-free condensed coconut milk or a sweetened condensed oat milk. The texture might vary slightly, but the delicious chocolate flavor will remain.
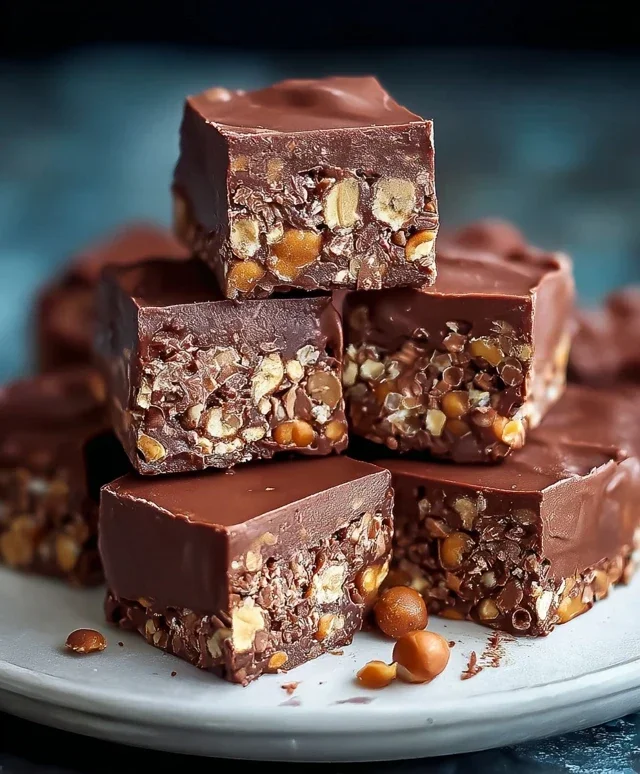
No-Bake Chocolate Biscuit Bars
Quick and easy no-bake chocolate biscuit bars with a rich chocolatey flavor and crunchy peanut texture. Perfect for a simple dessert or treat.
Ingredients
-
350g biscuits, crushed
-
85g ground peanuts
-
85g sugar
-
10g vanilla sugar (optional)
-
45g cocoa powder
-
180ml sweet cream
-
110g butter
-
90g milk chocolate
-
30g dark chocolate
-
30g vegetable oil
-
70g ground peanuts
Instructions
-
Step 1
Line a rectangular baking dish with parchment paper, leaving some overhang for easy removal. -
Step 2
In a large bowl, combine the crushed biscuits, 85g ground peanuts, sugar, optional vanilla sugar, and 45g cocoa powder. Mix well. -
Step 3
In a saucepan, heat the sweet cream and 110g butter over medium heat until the butter is melted and the mixture is warm. Do not boil. -
Step 4
Pour the warm cream mixture over the dry ingredients and stir until a thick, cohesive mixture forms. -
Step 5
Press the mixture evenly into the prepared baking dish. -
Step 6
In a microwave-safe bowl, melt the 90g milk chocolate and 30g dark chocolate with the 30g vegetable oil in 30-second intervals, stirring in between, until smooth. -
Step 7
Pour the melted chocolate mixture over the biscuit base, spreading it evenly to cover the entire surface. -
Step 8
Sprinkle the remaining 70g ground peanuts over the chocolate layer while it is still wet. -
Step 9
Refrigerate for at least 2 hours, or until firm. Cut into bars and serve.
Important Information
Nutrition Facts (Per Serving)
It is important to consider this information as approximate and not to use it as definitive health advice.
Allergy Information
Please check ingredients for potential allergens and consult a health professional if in doubt.