Easy Rhubarb Crisp Recipe- Delicious & Simple Dessert
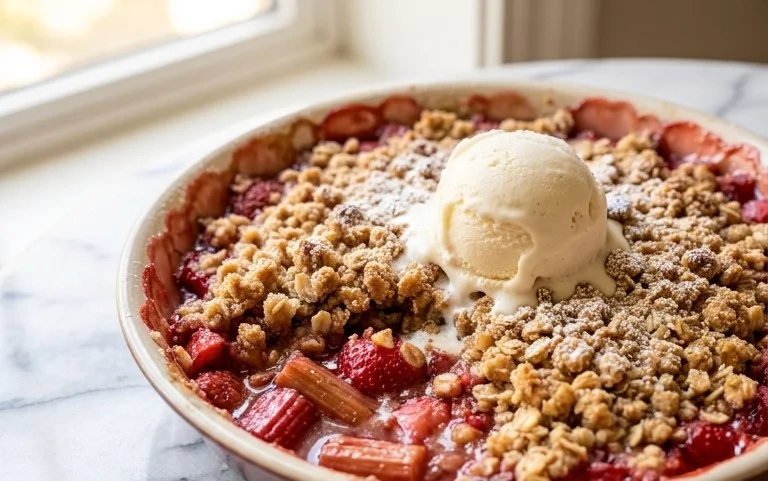
Easy Rhubarb Crisp is the dessert that whispers springtime, even when the weather outside is still a bit undecided. There’s something undeniably magical about that vibrant, slightly tart rhubarb, transformed into a comforting, sweet masterpiece. People adore this dish because it’s wonderfully forgiving and endlessly satisfying. It captures the essence of comfort food with its warm, bubbling fruit and that irresistible crunchy, buttery topping. What truly makes this easy rhubarb crisp so special is its deceptive simplicity. You get all the glorious flavors and textures of a classic dessert without any fuss. It’s the perfect way to celebrate the season’s bounty and share a little bit of sunshine with loved ones. Get ready to fall in love with this delightful treat!
Easy Rhubarb Crisp
There’s something incredibly comforting about a warm, bubbling fruit crisp. It’s the epitome of rustic dessert, simple to make but utterly delightful. And when it comes to fruit crisps, rhubarb holds a special place in my heart. Its tartness is wonderfully balanced by the sweet, crum extractbly topping, creating a flavor combination that’s both refreshing and satisfying. This Easy Rhubarb Crisp recipe is designed for maximum flavor with minimal fuss, making it perfect for both novice bakers and seasoned pros looking for a quick weeknight treat.
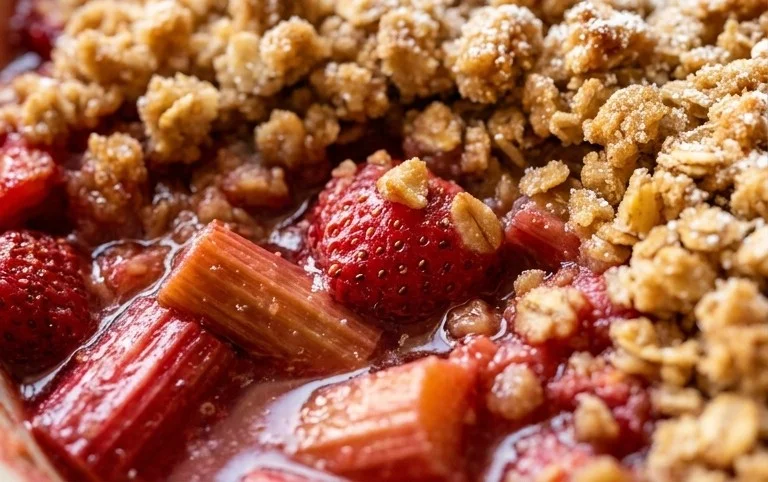
Rhubarb, often mistaken for a fruit but botanically a vegetable, has a unique tartness that makes it ideal for desserts. When baked, it softens beautifully, releasing its juices and creating a luscious filling. The key to a successful rhubarb crisp is finding that perfect balance between the tartness of the rhubarb and the sweetness of the topping. My approach here is to let the rhubarb shine, with just enough sweetness to tame its tang and a generous, buttery oat topping that provides a delightful textural contrast.
One of the best things about this recipe is its flexibility. While I’ve provided specific measurements, don’t be afraid to adjust them slightly based on your personal preference and the tartness of your rhubarb. If your rhubarb is particularly sour, you might want to add a tablespoon or two more sugar to the filling. Conversely, if you prefer a more pronounced tartness, a little less sugar will do the trick. The topping is also quite forgiving. Feel free to add a handful of chopped nuts like pecans or walnuts for an extra layer of flavor and crunch.
Ingredients:
Cooking Instructions:
Preparing the Rhubarb Filling:
The first step is to prepare our star ingredient: the rhubarb. If you’re using fresh rhubarb, give it a good wash and trim off any leafy tops (these are toxic and should be discarded). Then, chop the stalks into roughly 1-inch pieces. If you’re using frozen rhubarb, there’s no need to thaw it completely. You can often use it straight from the freezer, although you might need to bake it for a few minutes longer.
In a large bowl, combine the sliced rhubarb, 1/4 cup cornstarch, 3/4 cup sugar, and 1/2 teaspoon of ground cinnamon. Gently toss everything together until the rhubarb is evenly coated. The cornstarch is crucial here; it’s what will thicken the juices released by the rhubarb as it bakes, preventing a watery crisp and creating that lovely, jammy filling. The sugar will begin extract to draw out some of the moisture from the rhubarb, so let this mixture sit for about 10-15 minutes while you prepare the topping. This brief resting period also helps the flavors meld.
Crafting the Buttery Oat Topping:
Now for the best part – the crum extractbly topping! In a separate medium bowl, combine the 1 cup of oats, 1/2 cup of flour, 1/2 cup of sugar, the remaining 1/2 teaspoon of ground cinnamon, and a pinch of salt. Give these dry ingredients a quick whisk to ensure they are well distributed. The salt, though a small amount, is essential for balancing the sweetness and enhancing all the other flavors in the topping.
Next, add the cold, cubed butter to the dry ingredients. This is where you’ll use your fingertips or a pastry blender to cut the butter into the flour mixture. The goal is to create a crum extractbly texture, similar to coarse sand, with some pea-sized pieces of butter remaining. These larger pieces of butter will melt during baking, creating those wonderfully crisp, golden bits in the topping. Work relatively quickly so the butter doesn’t melt too much from the warmth of your hands. You want the butter to remain cold until it hits the oven.
Assembling and Baking Your Crisp:
Preheat your oven to 375 degrees Fahrenheit (190 degrees Celsius). While the oven is heating, prepare your baking dish. A 9×13 inch baking dish is ideal for this recipe, but an 8×8 inch dish will also work, just be sure to adjust baking time. Pour the prepared rhubarb filling into the bottom of your baking dish, spreading it out evenly. Try to get all those delicious juices in there!
Evenly sprinkle the oat topping over the rhubarb filling, making sure to cover the entire surface. Don’t press it down too firmly; a looser topping will result in a crispier texture. Place the baking dish on a baking sheet. This is a good habit to get into with any fruit crisp or pie, as it catches any potential bubbling over, saving you from a messy oven clean-up.
Bake for 35-45 minutes, or until the topping is golden brown and the rhubarb filling is bubbling around the edges. The exact baking time will depend on your oven and whether you used fresh or frozen rhubarb. If you notice the topping browning too quickly before the filling is fully cooked and bubbly, you can loosely tent the crisp with aluminum foil for the last 10-15 minutes of baking.
Cooling and Serving:
Once baked to perfection, remove the rhubarb crisp from the oven. It’s incredibly tempting to dig in immediately, but I highly recommend letting it cool for at least 15-20 minutes before serving. This allows the filling to set up slightly and prevents you from burning your tongue on molten-hot fruit. The aroma that fills your kitchen as it cools is simply divine!
Serve your warm rhubarb crisp on its own, or take it to the next level with a scoop of vanilla ice cream, a dollop of whipped cream, or a drizzle of heavy cream. The contrast between the warm, tart crisp and the cold, creamy accompaniment is pure bliss. Enjoy this delightful taste of spring and summer!
Conclusion:
I hope you’re as excited as I am to try this incredibly easy rhubarb crisp recipe! It’s a truly delightful dessert that strikes the perfect balance between tart rhubarb and a sweet, buttery, crum extractbly topping. The beauty of this recipe lies in its simplicity and its ability to deliver maximum flavor with minimal effort. It’s the ideal treat for showcasing fresh rhubarb, whether from your garden or the farmer’s market, and it’s guaranteed to be a crowd-pleaser.
This versatile crisp is wonderful served warm, perhaps with a generous scoop of vanilla ice cream or a dollop of whipped cream. For a little extra flair, consider a drizzle of caramel sauce or a sprinkle of toasted almonds over the top. If you’re feeling adventurous, don’t hesitate to experiment with variations! Adding a handful of fresh strawberries to the rhubarb mixture creates a beautiful “rhubarb-strawberry” flavor, or try incorporating a pinch of cinnamon or nutmeg into the topping for a warmer spice note. Regardless of how you serve it, I encourage you to give this easy rhubarb crisp a go – you won’t be disappointed!
Frequently Asked Questions about Easy Rhubarb Crisp:
Can I use frozen rhubarb?
Absolutely! If using frozen rhubarb, you can typically use it directly from frozen without thawing. You might need to add a tablespoon or two of extra flour or cornstarch to the filling to help absorb any extra moisture released during baking. Just follow the rest of the recipe as usual.
What if I don’t have oats for the topping?
No problem! If you’re out of oats, you can create a fantastic crisp topping using just flour, sugar, and butter. A good ratio to aim for is roughly 1 cup flour, 1/2 cup sugar, and 1/2 cup cold butter, cut together until crum extractbly. You can also substitute some of the flour with chopped nuts like pecans or walnuts for added crunch and flavor.
Easy Rhubarb Crisp
A simple and delicious rhubarb crisp, perfect for a quick dessert.
Ingredients
-
2 pounds sliced rhubarb (fresh or frozen)
-
1/4 cup cornstarch
-
3/4 cup sugar
-
1/2 teaspoon ground cinnamon
-
1 cup oats
-
1/2 cup flour
-
1/2 cup sugar
-
1/2 teaspoon ground cinnamon
-
1 pinch salt
-
1 stick cold butter, cubed
Instructions
-
Step 1
Preheat oven to 375°F (190°C). -
Step 2
In a large bowl, toss the sliced rhubarb with 1/4 cup cornstarch, 3/4 cup sugar, and 1/2 teaspoon cinnamon. Pour into an 8×8 inch baking dish. -
Step 3
In a separate medium bowl, combine 1 cup oats, 1/2 cup flour, 1/2 cup sugar, 1/2 teaspoon cinnamon, and 1 pinch of salt. -
Step 4
Cut in the cold butter using a pastry blender or your fingers until the mixture resembles coarse crumbs. -
Step 5
Sprinkle the oat mixture evenly over the rhubarb filling. -
Step 6
Bake for 30-35 minutes, or until the topping is golden brown and the rhubarb is bubbly. -
Step 7
Let cool slightly before serving.
Important Information
Nutrition Facts (Per Serving)
It is important to consider this information as approximate and not to use it as definitive health advice.
Allergy Information
Please check ingredients for potential allergens and consult a health professional if in doubt.