Restaurant Style Blender Salsa- Easy & Fresh Recipe
Blender salsa, often referred to as restaurant-style salsa, is a game-changer for any home cook. Forget those pre-jarred versions that lack that vibrant, fresh zing! There’s something undeniably special about replicating that perfectly balanced, slightly chunky, yet incredibly smooth texture and flavor that you only usually find at your favorite Mexican eatery. It’s that tangy, spicy, and utterly addictive concoction that elevates tortilla chips from a simple snack to a culinary experience. The magic of this blender salsa lies in its simplicity and speed; you can whip up a batch in minutes, transforming humble ingredients into a party-starting dip. We all love a good salsa, but this restaurant-style blender salsa is the one that will have everyone asking for the recipe!
Blender Salsa (Restaurant Style Salsa)
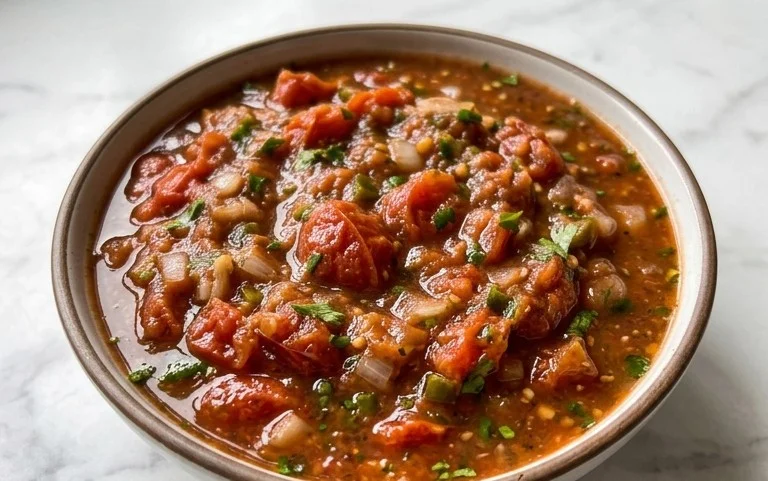
There’s something undeniably satisfying about a vibrant, fresh salsa that perfectly complements your favorite chips or tacos. While store-bought options are convenient, nothing beats the flavor and texture of homemade blender salsa. This recipe is designed to replicate that beloved restaurant-style salsa – bright, zesty, and with just the right amount of kick. The beauty of this recipe lies in its simplicity and speed; the blender does all the heavy lifting, transforming a few key ingredients into a flavorful salsa in mere minutes. Forget spending hours chopping; this is your shortcut to salsa perfection.
This recipe focuses on achieving that characteristic texture – not too chunky, not too smooth, but perfectly blended with tiny flecks of the ingredients visible. We’re also aiming for that balanced flavor profile that makes restaurant salsa so addictive: the sweetness of the tomatoes, the bite of the onion, the herbaceousness of the cilantro, the zing of the lime, and the gentle heat of the pepper.
Ingredients:
Making Your Restaurant-Style Salsa
The process of creating this incredible salsa is remarkably straightforward, thanks to the magic of a blender. You’ll be amazed at how quickly simple ingredients can transform into a culinary delight.
Gather all your ingredients and prepare them as specified. This is the most crucial step for ensuring a smooth blending process. For the diced tomatoes, there’s no need to drain them; the liquid is essential for achieving the right consistency. Simply open the can and pour it directly into your blender. For the red onion, quartering it and then roughly chopping it will help it blend more easily. Cilantro should be loosely packed to measure 1/4 cup. For the lime, you’ll want to zest it first, capturing all that fragrant citrus oil, and then cut it in half to juice. For the jalapeno (or serrano) pepper, I recommend wearing gloves when handling them. Cut off the stem, slice it in half lengthwise, and then use a small spoon to scrape out the seeds and membranes. This is where most of the heat resides, so adjusting the amount you seed will control the spice level. If you prefer a milder salsa, remove all the seeds. If you like it spicier, leave a few in. Coarsely chop the seeded pepper. Finally, peel your garlic cloves and give them a rough chop.
Now, it’s time to load up your blender. Start by adding the coarsely chopped red onion, cilantro, seeded and chopped jalapeno pepper, and the chopped garlic to the blender jar. Placing these ingredients in first, before the wetter ingredients, can sometimes help the blades grab them more effectively. Next, add the zest and juice of the lime. The lime is a flavor powerhouse here, adding brightness and acidity that cuts through the richness of the tomatoes and balances the other flavors. Finally, pour in the entire can of undrained diced tomatoes.
Add the dry seasonings to the blender. Sprinkle in the 1/4 teaspoon of ground cumin. Cumin adds a subtle earthy depth that is a hallmark of great salsas. Now, it’s time to season with salt and black pepper. I like to start with a good pinch of salt and a few grinds of black pepper. You can always add more later, but it’s difficult to take it away. Close the lid securely on your blender.
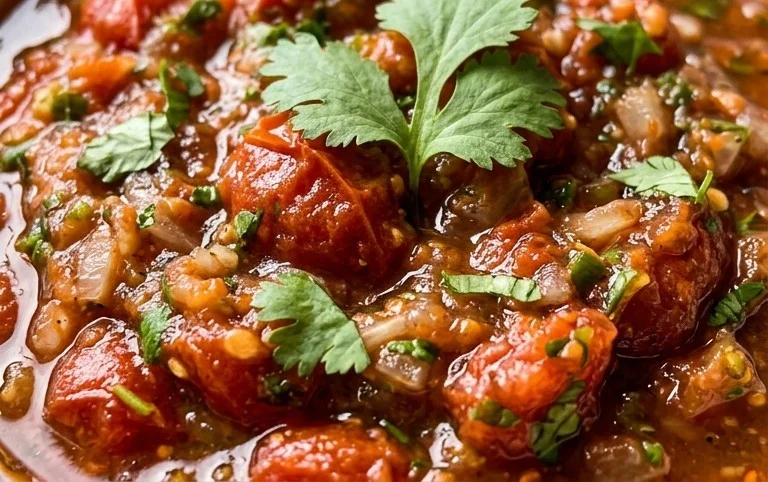
Begin extract blending the ingredients. Start by pulsing the blender a few times. This initial pulsing helps to break down the larger chunks and get everything moving. Then, transition to a steady blend. You’ll want to blend until you reach your desired consistency. For a restaurant-style salsa, aim for a texture that is mostly blended but still has some visible texture. Avoid over-blending, which can result in a watery or paste-like consistency. This usually takes about 30 to 60 seconds of continuous blending, depending on the power of your blender. Keep an eye on it and stop when it looks just right. You should see tiny flecks of onion, cilantro, and pepper throughout.
Taste and adjust seasonings. This is a crucial step that truly elevates your salsa from good to exceptional. Carefully remove the blender lid and use a spoon to taste a small amount of the salsa. Does it need more salt to bring out the flavors? Perhaps a bit more pepper for a subtle kick? Does it need another squeeze of lime juice to brighten it up further? This is your opportunity to customize it to your exact preferences. Add any necessary adjustments, a little at a time, and give the salsa a quick pulse or a gentle stir to incorporate the additions. Continue tasting and adjusting until you’re completely satisfied with the flavor profile. Don’t be afraid to experiment! If you find it too chunky, you can give it a slightly longer blend. If it’s too thick, you can add a tablespoon or two of water or even a splash of the tomato juice from the can.
Serve and enjoy. Once you’ve perfected your blender salsa, transfer it to a serving bowl. For the best flavor, I highly recommend letting it rest for at least 15-30 minutes in the refrigerator before serving. This allows the flavors to meld and deepen, creating a more complex and satisfying taste. It’s absolutely delicious served with your favorite tortilla chips, spooned over tacos or burritos, as a topping for grilled chicken or fish, or even mixed into a dip. You can store any leftover salsa in an airtight container in the refrigerator for up to 5 days. The flavor often intensifies over time, making it even better the next day!
Conclusion:
I hope you’re as excited as I am about this incredible Blender Salsa recipe! It’s truly a game-changer, delivering that vibrant, fresh, and perfectly balanced restaurant-style salsa right in your own kitchen. The beauty of this recipe lies in its simplicity and speed. With just a few pulses in your blender, you transform humble ingredients into a flavor explosion that will elevate any meal. It’s the perfect accompaniment to tacos, burritos, nachos, quesadillas, or simply enjoyed with a bowl of your favorite tortilla chips. Don’t be afraid to experiment with variations! Try adding a pinch of smoked paprika for a smoky depth, a dash of adobo sauce for a little heat and tang, or even a spoonful of roasted corn for sweetness and texture. The possibilities are endless, and I truly encourage you to give this blender salsa a try. You won’t be disappointed!
Frequently Asked Questions:
Why is this blender salsa considered ‘restaurant-style’?
This recipe mimics restaurant salsa by using fresh, raw ingredients and achieving a wonderfully smooth yet slightly chunky texture that’s difficult to replicate with hand-chopping. The quick blending process releases the flavors of the tomatoes, onions, peppers, and cilantro beautifully.
Can I make this blender salsa ahead of time?
Absolutely! In fact, I find the flavors meld even better after resting in the refrigerator for at least 30 minutes. It can be stored in an airtight container in the fridge for up to 3-4 days. Just give it a stir before serving.
What if I don’t have fresh jalapeños?
You can substitute with canned pickled jalapeños for a similar tang and a touch of heat. Start with a small amount and add more to your taste preference, as their heat level can vary.
Blender Salsa (Restaurant Style Salsa)
Quick and easy restaurant-style salsa made in your blender with fresh ingredients.
Ingredients
-
1 (14.5-ounce can) Diced Tomatoes (don’t drain)
-
1/4 small Red Onion (about 1/3 cup coarsely chopped)
-
1/4 cup Cilantro
-
1 Lime (zested and juiced)
-
1 Jalapeno Pepper (or Serrano Pepper) (seeded and coarsely chopped)
-
2 cloves Garlic (coarsely chopped)
-
1/4 teaspoon Ground Cumin
-
Salt (to taste)
-
Black Pepper (to taste)
Instructions
-
Step 1
Add diced tomatoes (undrained), red onion, cilantro, lime zest, lime juice, jalapeno, and garlic to a blender. -
Step 2
Add ground cumin, salt, and black pepper. -
Step 3
Secure the lid on the blender. -
Step 4
Pulse the blender several times until the ingredients are coarsely chopped and well combined. Avoid over-blending to maintain a slightly chunky texture. -
Step 5
Taste and adjust seasoning with more salt and pepper if needed. -
Step 6
Transfer to a bowl and serve immediately, or chill for at least 30 minutes for flavors to meld.
Important Information
Nutrition Facts (Per Serving)
It is important to consider this information as approximate and not to use it as definitive health advice.
Allergy Information
Please check ingredients for potential allergens and consult a health professional if in doubt.