Nova Scotia Blueberry Cream Cake Recipe – Deliciously Easy
Nova Scotia Blueberry Cream Cake is more than just a dessert; it’s a taste of summer captured in every delightful bite. Imagin extracte plump, juicy blueberries bursting with sweetness, nestled within a light, airy cake, all enveloped in a cloud of velvety cream. This is the essence of the Nova Scotia Blueberry Cream Cake, a beloved treat that evokes memories of sun-drenched fields and the simple joy of freshly picked berries. What makes this cake truly special is its perfect balance of textures and flavors. The slightly tart blueberries cut through the richness of the creamy topping, creating a symphony on your palate. It’s no wonder this Nova Scotia Blueberry Cream Cake holds such a cherished place in so many hearts – it’s a comforting embrace, a celebratory centerpiece, and a delicious escape all rolled into one. Get ready to fall in love with this iconic Canadian classic.
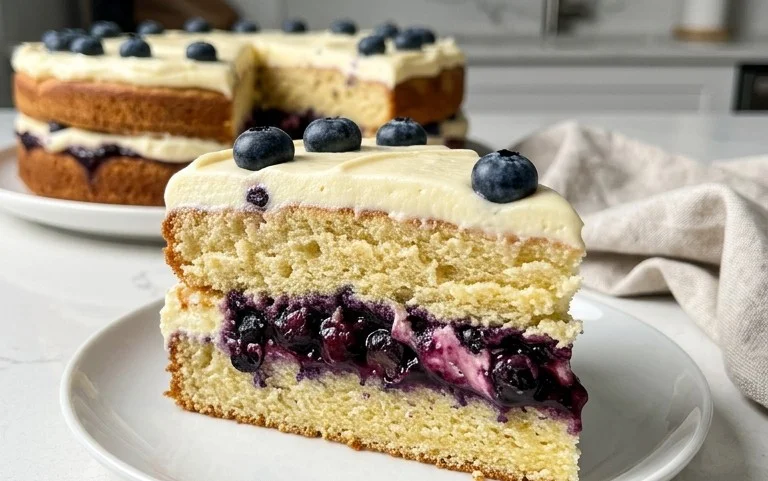
Nova Scotia Blueberry Cream Cake
There’s something incredibly comforting about a slice of homemade cake, and when it’s infused with the sweet, slightly tart burst of fresh blueberries, it’s pure bliss. This Nova Scotia Blueberry Cream Cake is a true taste of the Maritimes, where blueberries are abundant and cherished. It features a tender, moist cake base generously studded with juicy blueberries, all crowned with a luscious, creamy topping that melts in your mouth. This recipe has been a family favorite for years, and I’m so excited to share it with you. It’s the perfect treat for a summer picnic, a special occasion, or simply when you need a little bit of sunshine on a plate.
Ingredients:
Preparing the Cake Base
This cake comes together in two main parts: the cake base and the glorious cream topping. We’ll start by building the foundation for our delicious dessert.
1. First, preheat your oven to 350°F (175°C). Lightly grease and flour a 9-inch square baking pan. This ensures that your cake won’t stick and will release beautifully once it’s baked. In a medium bowl, whisk together the 1 ½ cups of all-purpose flour, ½ cup of sugar, and 1 ½ teaspoons of baking powder. This dry mixture will form the structure of our cake. Make sure the baking powder is evenly distributed for a consistent rise.
2. In a separate large bowl, cream together the ½ cup of softened butter and the 1 egg. You can use an electric mixer for this, or a sturdy whisk and a bit of elbow grease. Creaming the butter and egg until light and fluffy is crucial for creating a tender cake crum extractb. The butter should be soft enough to indent with your finger, but not melted. Once combined, gradually add the dry ingredients to the wet ingredients, mixing just until combined. Be careful not to overmix the batter, as this can lead to a tough cake. A few small lumps are perfectly fine.
3. Now for the star of the show: the blueberries! Gently fold in the 4 cups of fresh blueberries into the cake batter. I like to use fresh, plump blueberries for the best flavor and texture. If you’re using frozen blueberries, there’s no need to thaw them, but be aware they might release a bit more liquid during baking. Be gentle when folding them in to avoid crushing too many of them, as you want those beautiful bursts of flavor throughout the cake.
4. Pour the batter into your prepared baking pan, spreading it evenly. Try to distribute the blueberries as evenly as possible. You might notice the batter is quite thick, which is normal due to the high blueberry content. Pop this into your preheated oven and bake for approximately 35-45 minutes, or until a wooden skewer inserted into the center comes out clean. The cake should be golden brown around the edges.
Creating the Luscious Cream Topping
While the cake is baking, we’ll prepare the decadent cream topping that truly elevates this dessert. This topping is a simple yet incredibly effective way to add richness and a delightful tang.
5. In a medium bowl, combine the 2 cups of sour cream, ½ cup of white sugar, 2 egg yolks, and 1 teaspoon of vanilla extract. Whisk these ingredients together until the mixture is smooth and well combined. The sour cream provides a lovely tang that cuts through the sweetness, while the egg yolks add richness and help the topping set. The vanilla extract adds that classic comforting aroma and flavor.
6. Once the cake has baked and is still warm (but not piping hot), carefully remove it from the oven. Pour the prepared sour cream mixture evenly over the top of the warm cake. You don’t need to spread it perfectly, as it will naturally flow and cover the cake as it bakes further.
7. Return the cake to the oven for another 10-15 minutes, or until the topping is set and lightly golden. The topping will develop a beautiful, slightly puffed appearance. Be careful not to overbake, or the topping could become too firm. The goal is a creamy, luscious topping that complements the cake perfectly.
Once baked, let the Nova Scotia Blueberry Cream Cake cool in the pan on a wire rack for at least 20-30 minutes before slicing and serving. This allows the cake to set up properly and the flavors to meld. It’s delicious served warm or at room temperature, and it’s particularly wonderful with a dollop of extra whipped cream or a scoop of vanilla ice cream. Enjoy this little taste of Nova Scotia!
Conclusion:
There you have it – a delightful Nova Scotia Blueberry Cream Cake that’s perfect for any occasion! This recipe truly shines with its tender, moist cake infused with the sweet burst of fresh blueberries, all balanced beautifully by a light and luscious cream topping. It’s a taste of the Maritimes that’s incredibly satisfying and surprisingly easy to create. Whether you’re celebrating a special event or simply craving a homemade treat, this cake is sure to impress. I love serving this cake slightly warm, allowing the cream to just begin extract to melt into the cake, creating a heavenly texture. It’s also wonderful chilled, making it a perfect make-ahead option. For variations, consider folding a little lemon zest into the batter for an extra bright flavor, or a hint of cinnamon. You could also substitute other berries like raspberries or a mix for a different twist. Don’t hesitate to try this Nova Scotia Blueberry Cream Cake – it’s a true gem that I’m confident you’ll adore.
Frequently Asked Questions:
Can I use frozen blueberries instead of fresh?
Absolutely! If using frozen blueberries, I recommend tossing them with a tablespoon of flour before adding them to the batter. This helps prevent them from sinking to the bottom and creating purple streaks. You might also need to bake the cake a few minutes longer.
What kind of cream is best for the topping?
I prefer using heavy whipping cream for the topping as it whips up beautifully and holds its shape. Make sure it’s cold for the best results. If you prefer something lighter, you could certainly experiment with a whipped cream cheese frosting, though it will have a different texture and tang.
How should I store leftover cake?
Leftover Nova Scotia Blueberry Cream Cake is best stored in an airtight container in the refrigerator. Due to the cream topping, it will keep well for 2-3 days. Enjoy it cold or let it come to room temperature for about 20 minutes before serving for a softer texture.
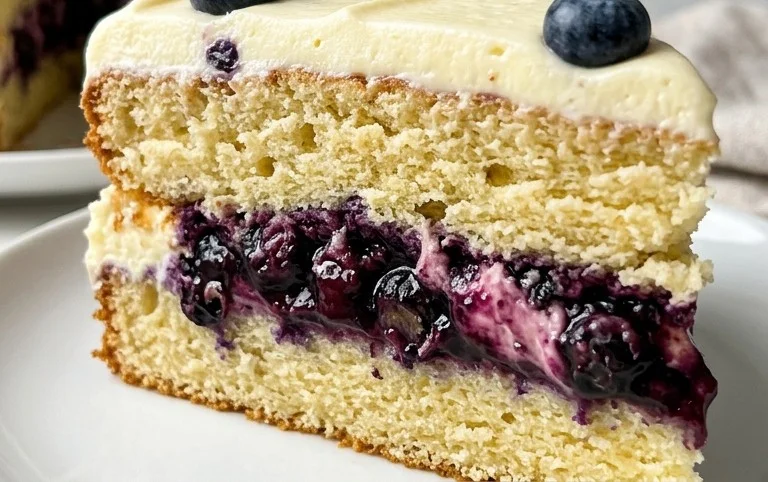
Nova Scotia Blueberry Cream Cake
A delightful and moist cake featuring fresh Nova Scotian blueberries suspended in a rich sour cream batter, topped with a sweet cream glaze. Perfect for any occasion.
Ingredients
-
1 ½ cup all purpose flour
-
½ cup sugar
-
1 ½ tsp baking powder
-
½ cup butter, softened
-
1 egg
-
4 cups blueberries, fresh
-
2 cups sour cream
-
½ cup white sugar
-
2 egg yolks
-
1 tsp vanilla extract
Instructions
-
Step 1
Preheat oven to 350°F (175°C). Grease and flour a 9-inch round cake pan. -
Step 2
In a large bowl, whisk together the all-purpose flour, ½ cup sugar, and baking powder. -
Step 3
In a separate bowl, cream together the softened butter and 1 egg until well combined. Gradually beat in the sour cream and vanilla extract. -
Step 4
Add the wet ingredients to the dry ingredients and mix until just combined. Gently fold in the fresh blueberries. -
Step 5
Pour the batter into the prepared cake pan and spread evenly. -
Step 6
Bake for 45-55 minutes, or until a wooden skewer inserted into the center comes out clean. -
Step 7
While the cake is baking, prepare the glaze: whisk together the ½ cup white sugar, 2 egg yolks, and 1 tsp vanilla extract in a small bowl. -
Step 8
Once the cake is out of the oven, let it cool in the pan for 10 minutes. Then, carefully invert the cake onto a wire rack. While still warm, pour the glaze over the top of the cake, allowing it to drip down the sides. -
Step 9
Let the cake cool completely before serving.
Important Information
Nutrition Facts (Per Serving)
It is important to consider this information as approximate and not to use it as definitive health advice.
Allergy Information
Please check ingredients for potential allergens and consult a health professional if in doubt.